Client & License Management
Client and License Management in NodeZero enable organizations to manage multiple clients or business units within a single NodeZero deployment, and to flexibly allocate the parent's licenses among child accounts. These features are particularly useful for Managed Security Service Providers (MSSPs) or large enterprises with multiple distinct security environments. They enable the parent account's owner to limit and monitor usage, and to adjust allocations and limits as needed.
Requirements
-
You must have the
Org Adminrole in order to access the NodeZero Portal's Settings > Client Management and Settings > License Management pages. -
Your account must have multi-tenancy enabled. (All MSP/MSSP access levels include this feature.) To add multi-tenancy, please reach out to our sales team for assistance.
The Org Admin role can create clients within the parent organization, switch among client accounts, and manage all these accounts. This enables the Admin to allocate and reallocate licenses from the parent's pool across clients' assets and applications (WebApps).
Accessing Client and License Management
- Verify that you have
Org Adminpermissions. - Open the user profile menu at the NodeZero Portal's top right, and select Settings.
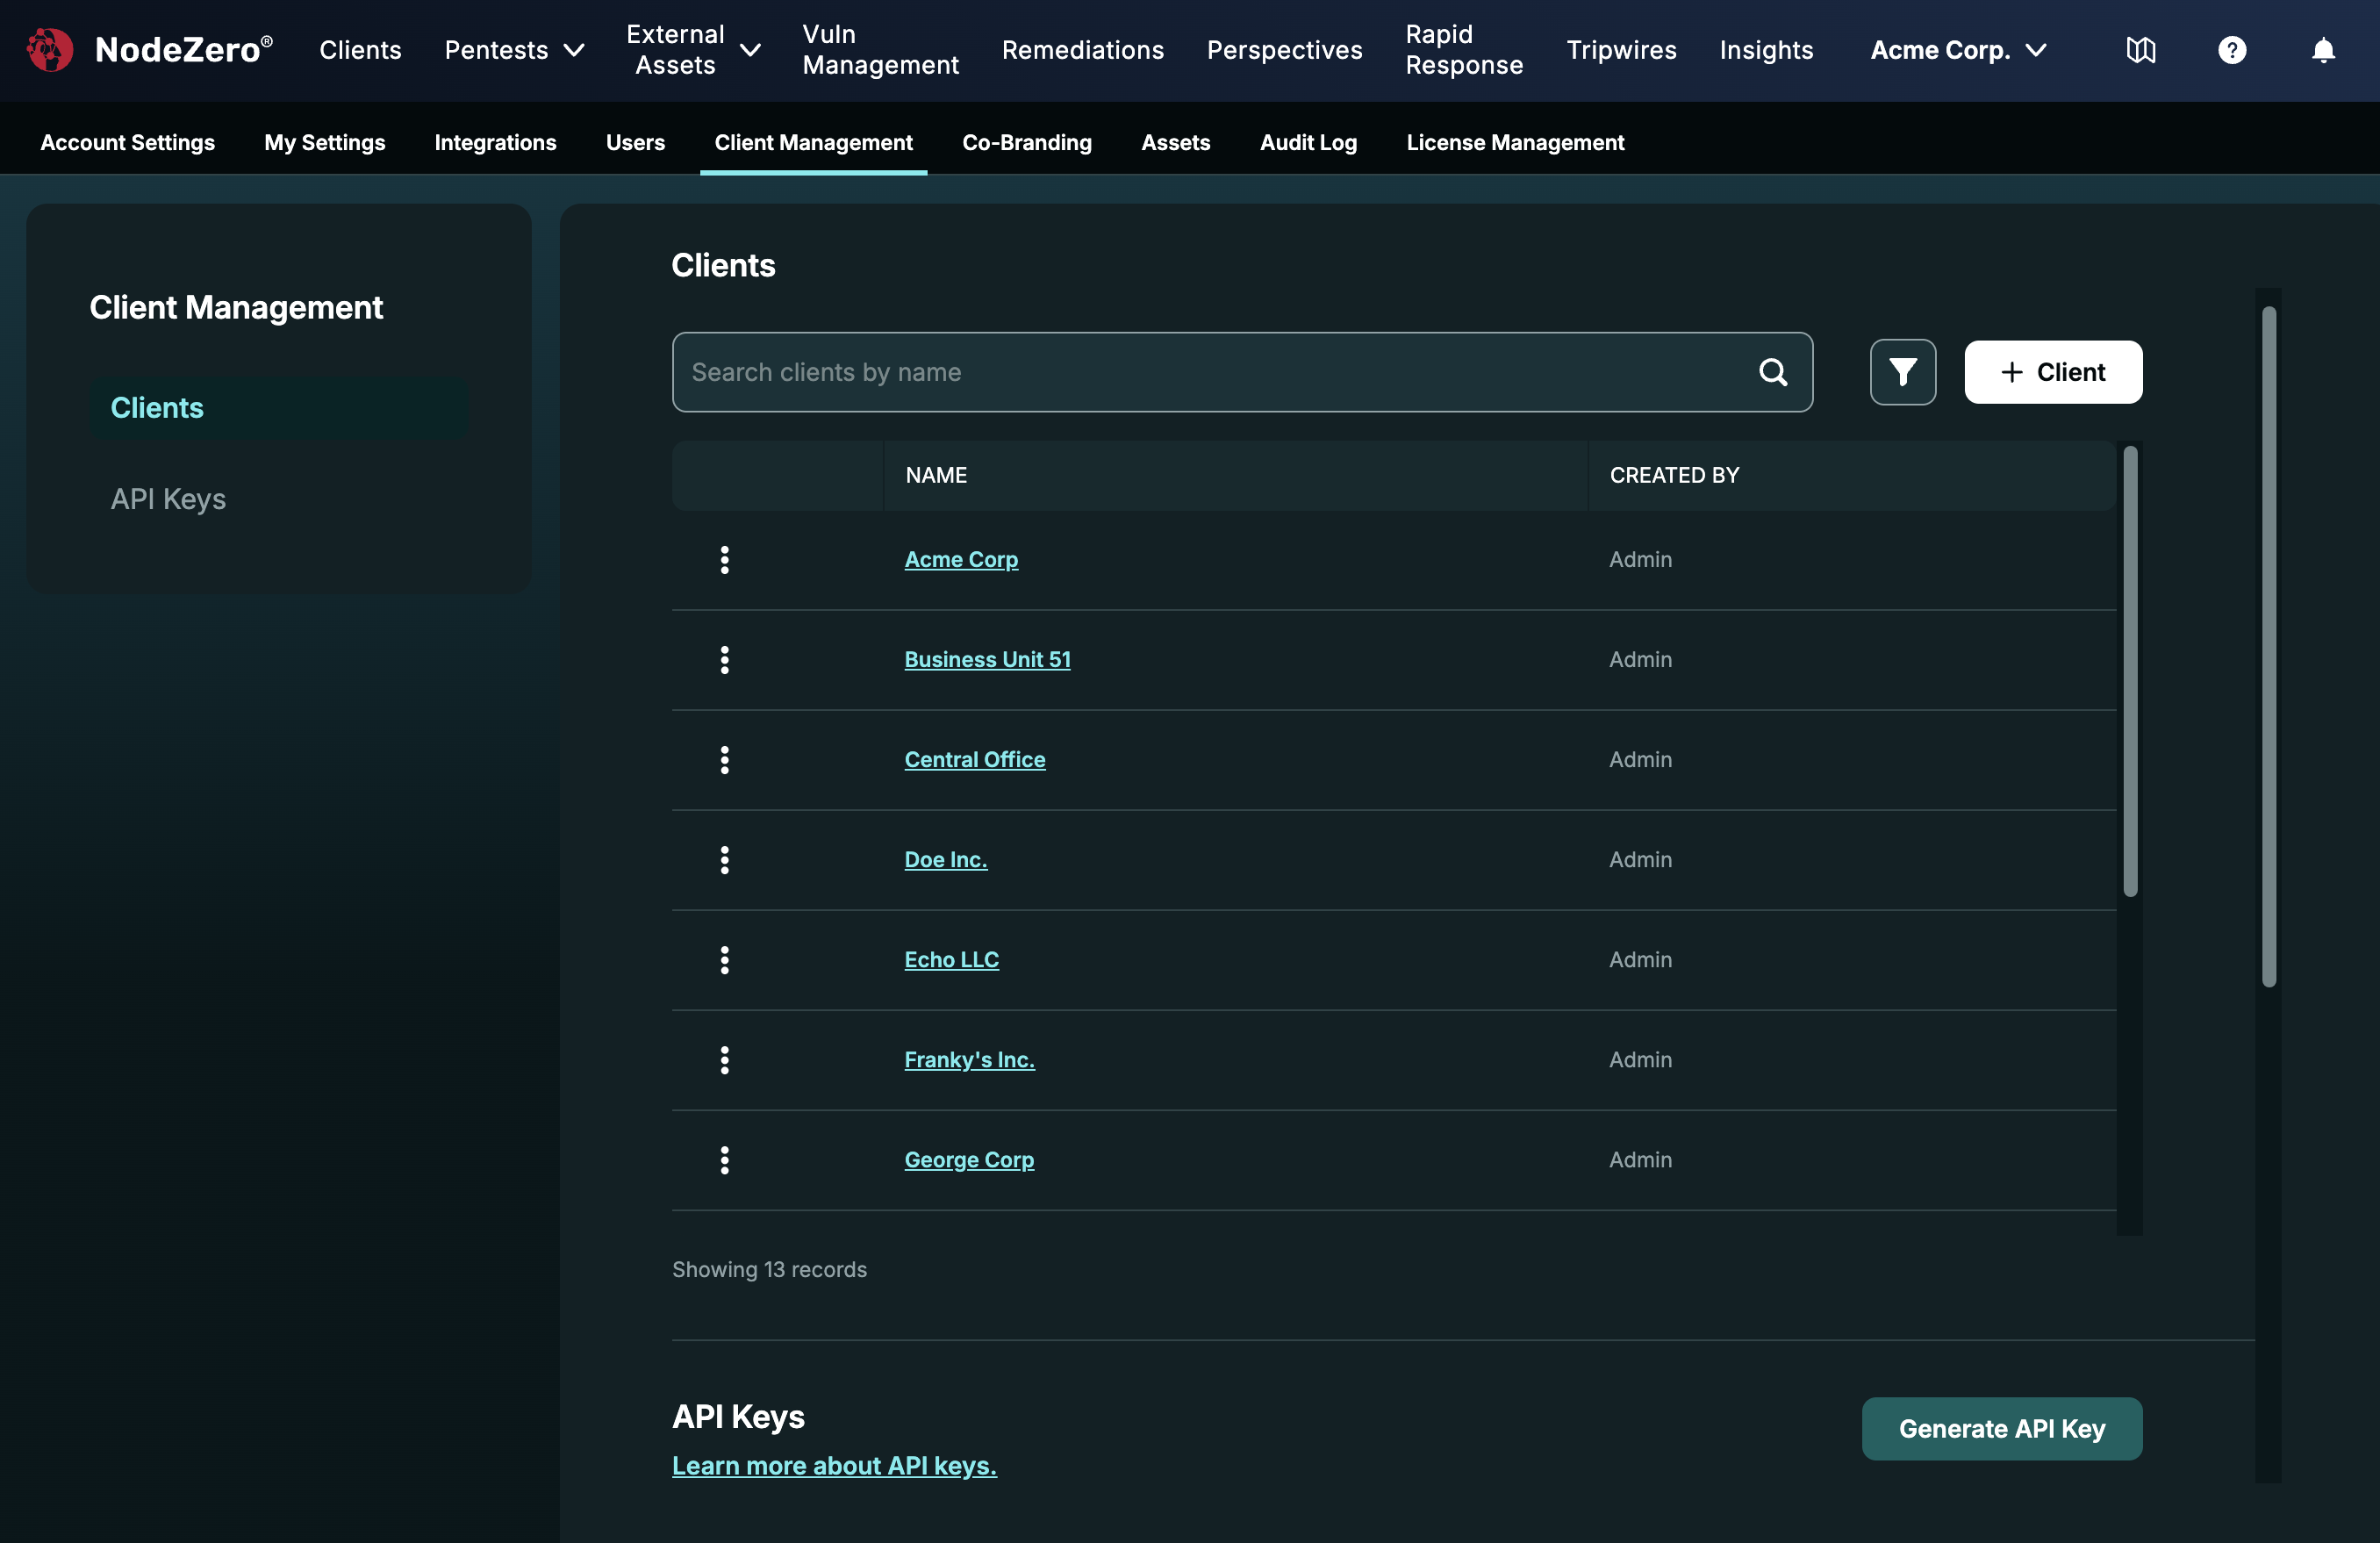
- From the resulting Settings submenu, select Client Management. This opens the page shown below. (Note the related License Management tab at the far right.)
Adding New Clients
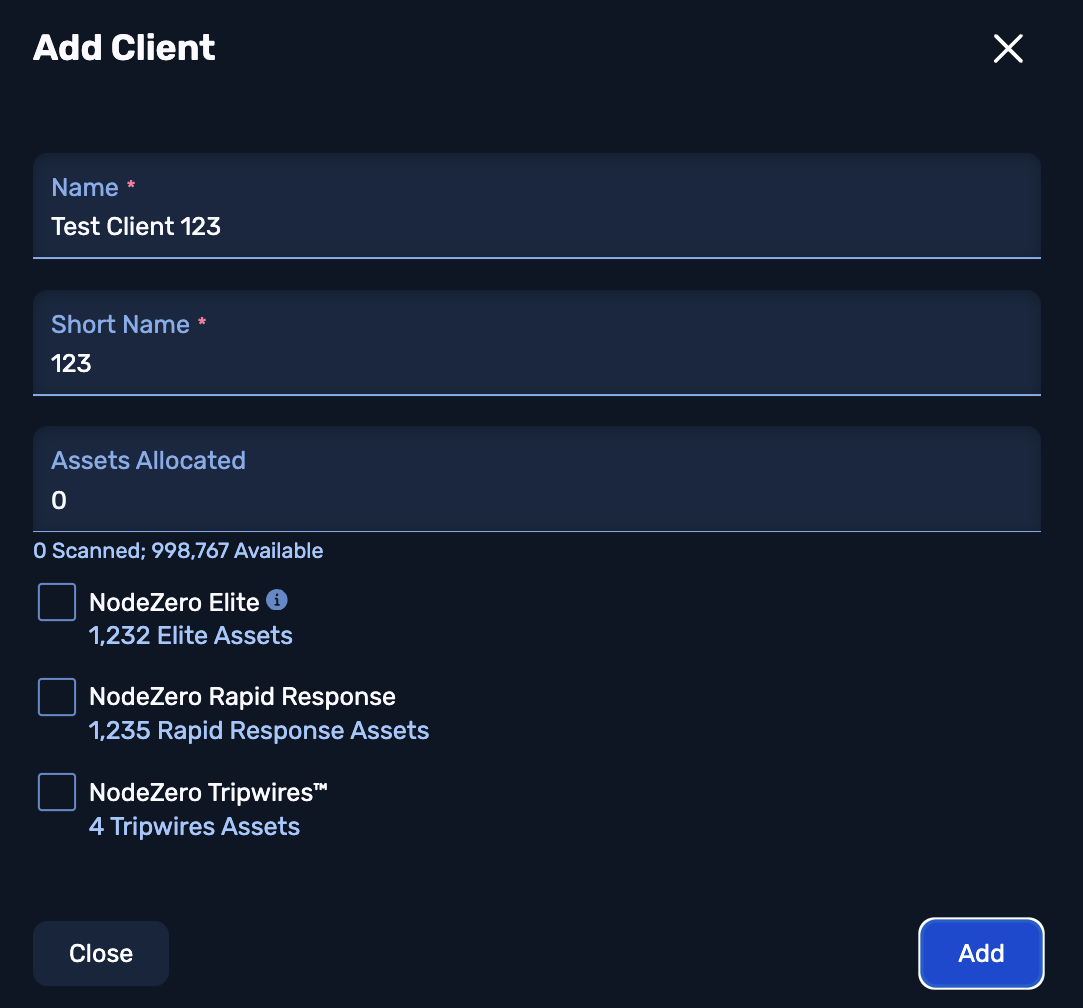
- On the Client Management page's right side, click the + Client button.
- Provide the company with a
Nameand aShort Name. - Click Add.
After creating the client, you can allocate licenses and additional package features to them in
Managing an Existing Client
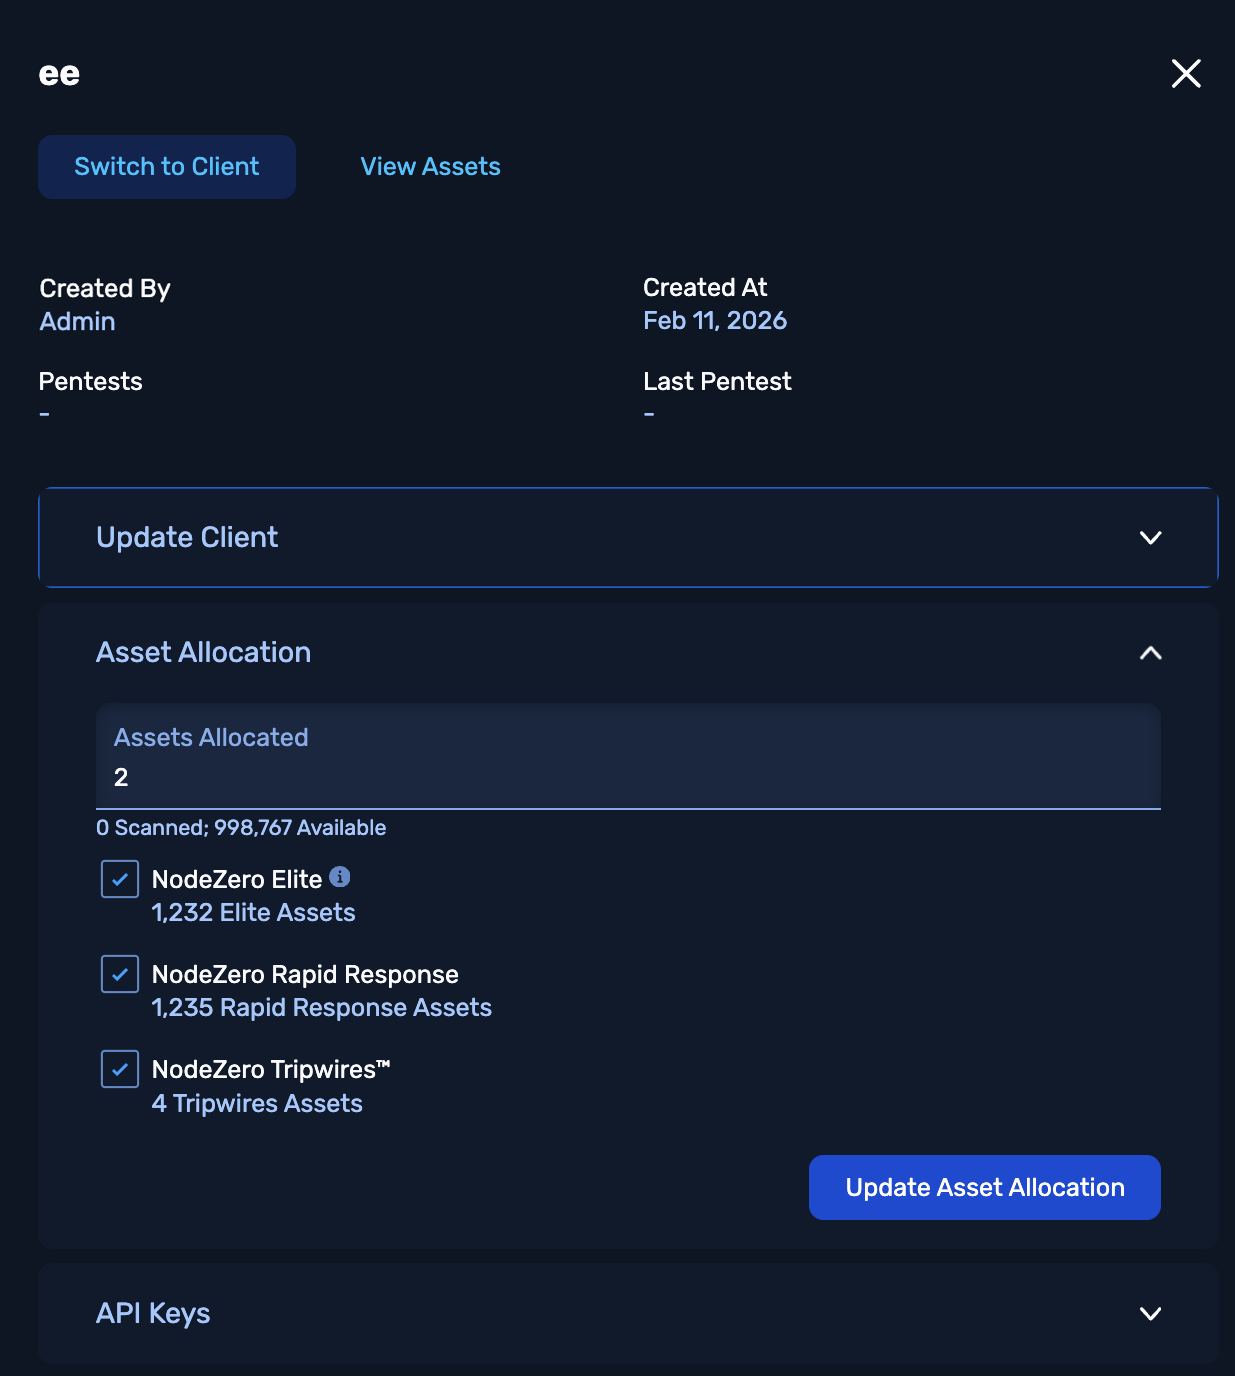
From the Client Management page, Org Admins of parent accounts can manage clients by selecting the account they wish to modify. The resulting drawer enables renaming the client, managing its API keys, and (as covered in the following sections) switching to or deleting the client. (API keys that you generate from this drawer will be scoped to the selected client.)
Switching to a Client
From the Client drawer shown above, you can click Switch to Client to pivot directly into a client account. This enables you to explore their penetration testing activity in depth – view results, findings, and trends as if you’re operating within their environment.
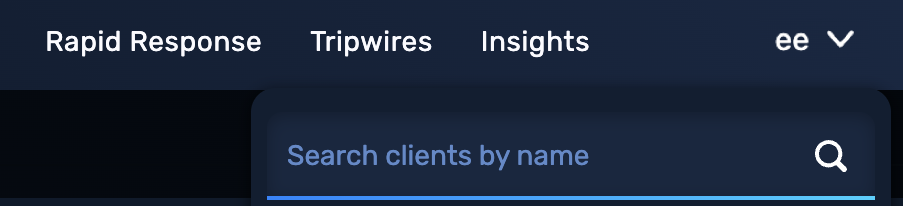
To switch back to the parent account, the top navigation bar provides the drop-down shown here.
Deleting Clients
To schedule deletion of an existing client:
-
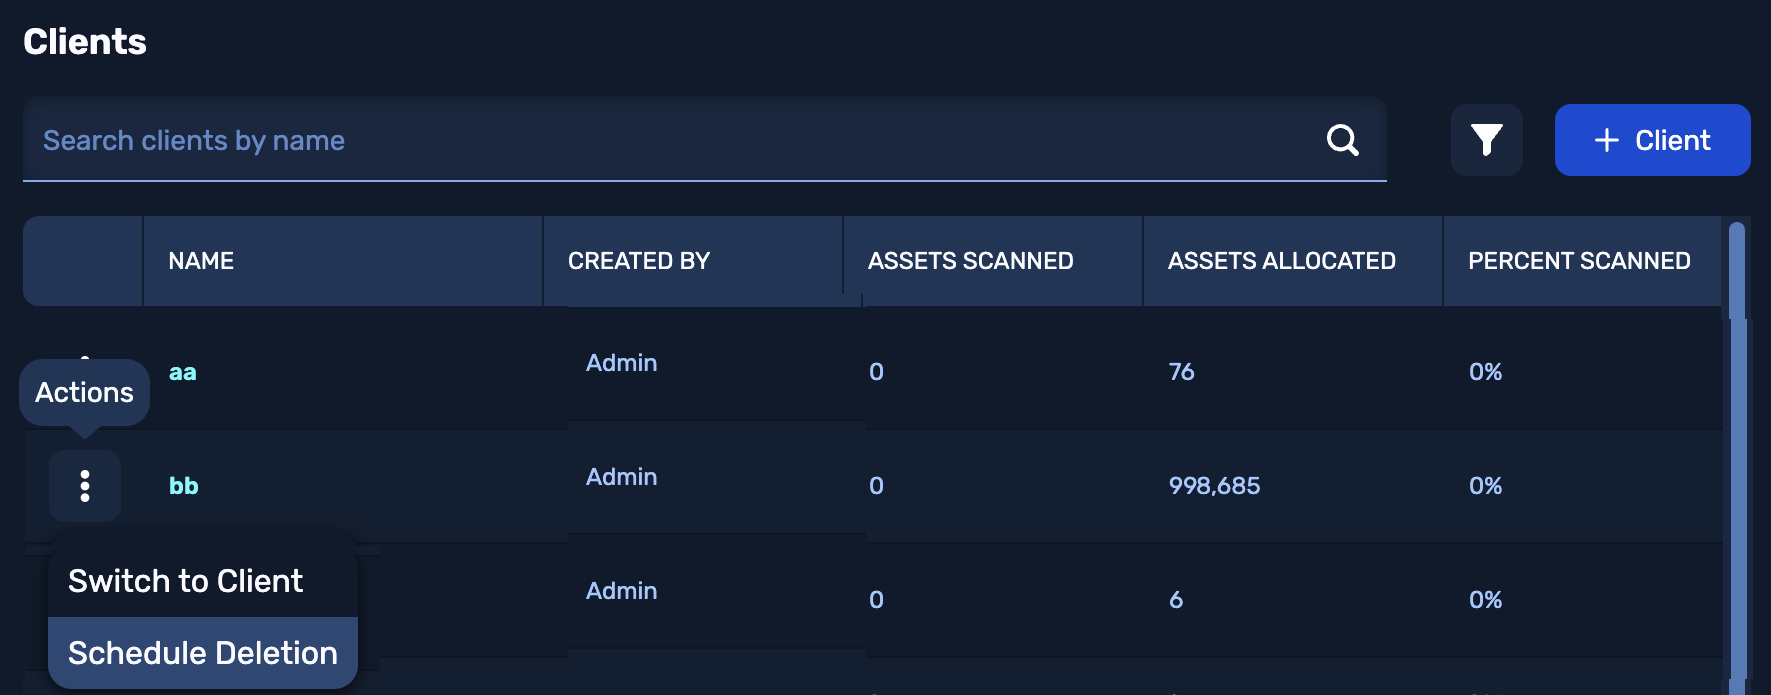
Click the Actions menu () to the left of the client's name.
-
Select Schedule Deletion.
-
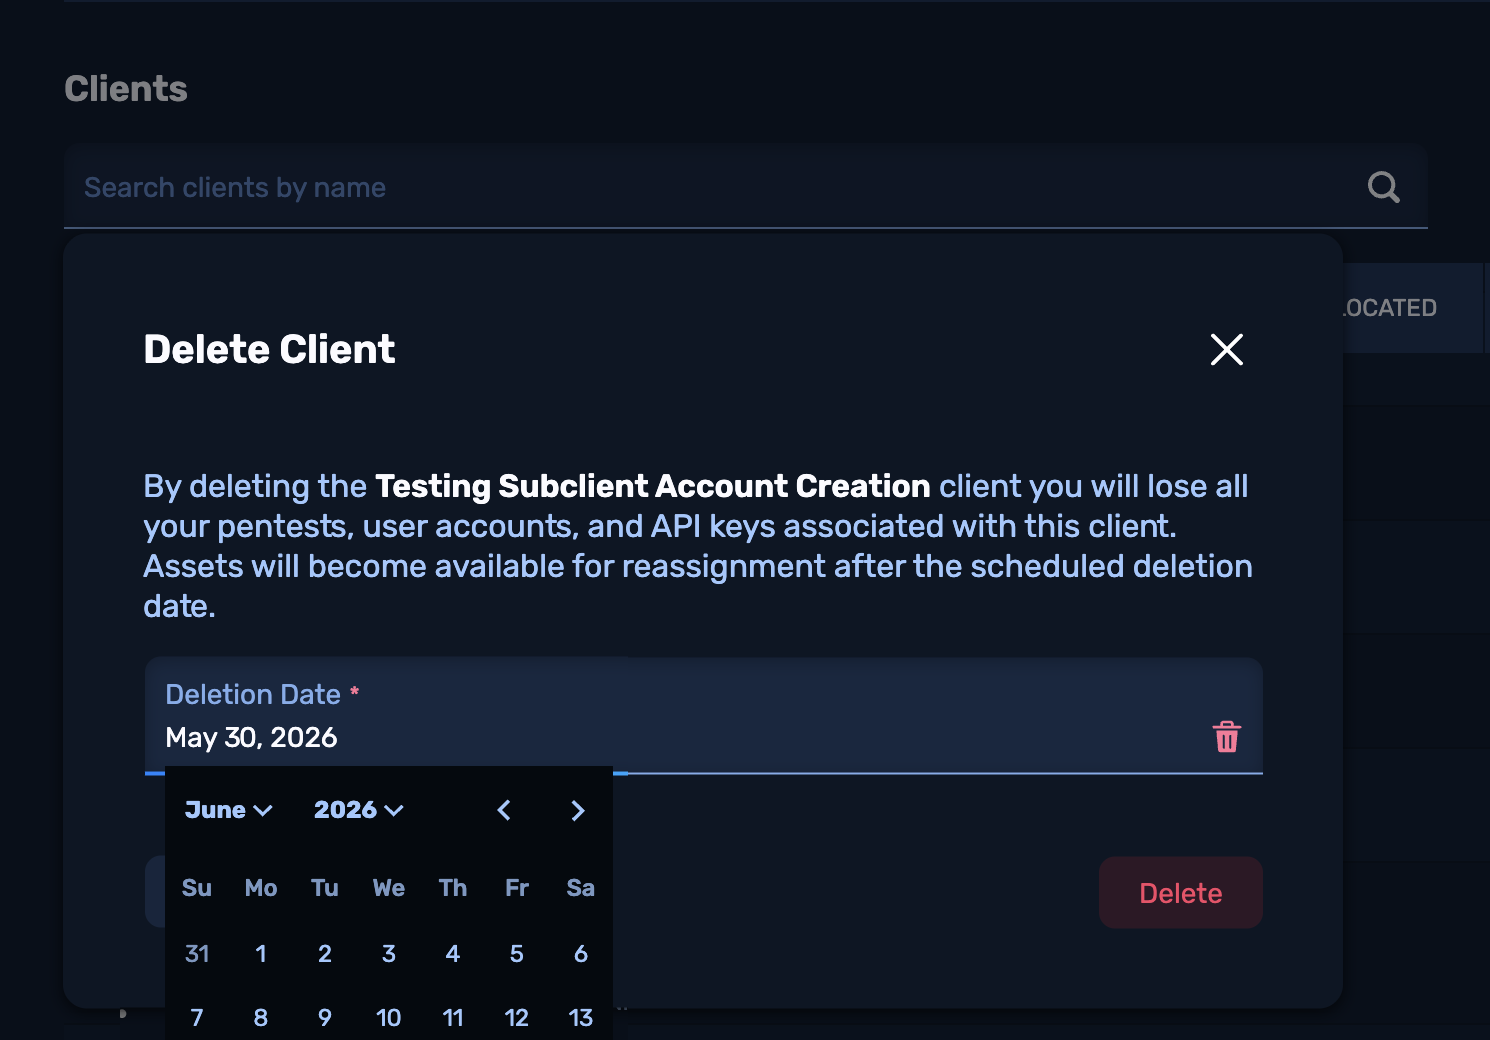
Accept the default deletion date (30 days out), or use the date picker to select a later date.
-
Select the Schedule Deletion button.
Until the scheduled date, you can prevent a client's deletion by reopening the client's Actions menu () and selecting Cancel Scheduled Deletion.

Marking a client for deletion affects the parent account's overall pool of licenses as follows:
-
The client's allocated number of asset/application licenses, whether scanned or unused, are returned to the parent's pool on the deletion date.
-
If you want to recover unused licenses sooner, directly reduce this client's allocation to a non-zero number. This will immediately free up the additional licenses for the parent to reallocate.
Allocations and Licenses
As the Org Admin of a parent account, to allocate licenses among your clients, select the Settings >
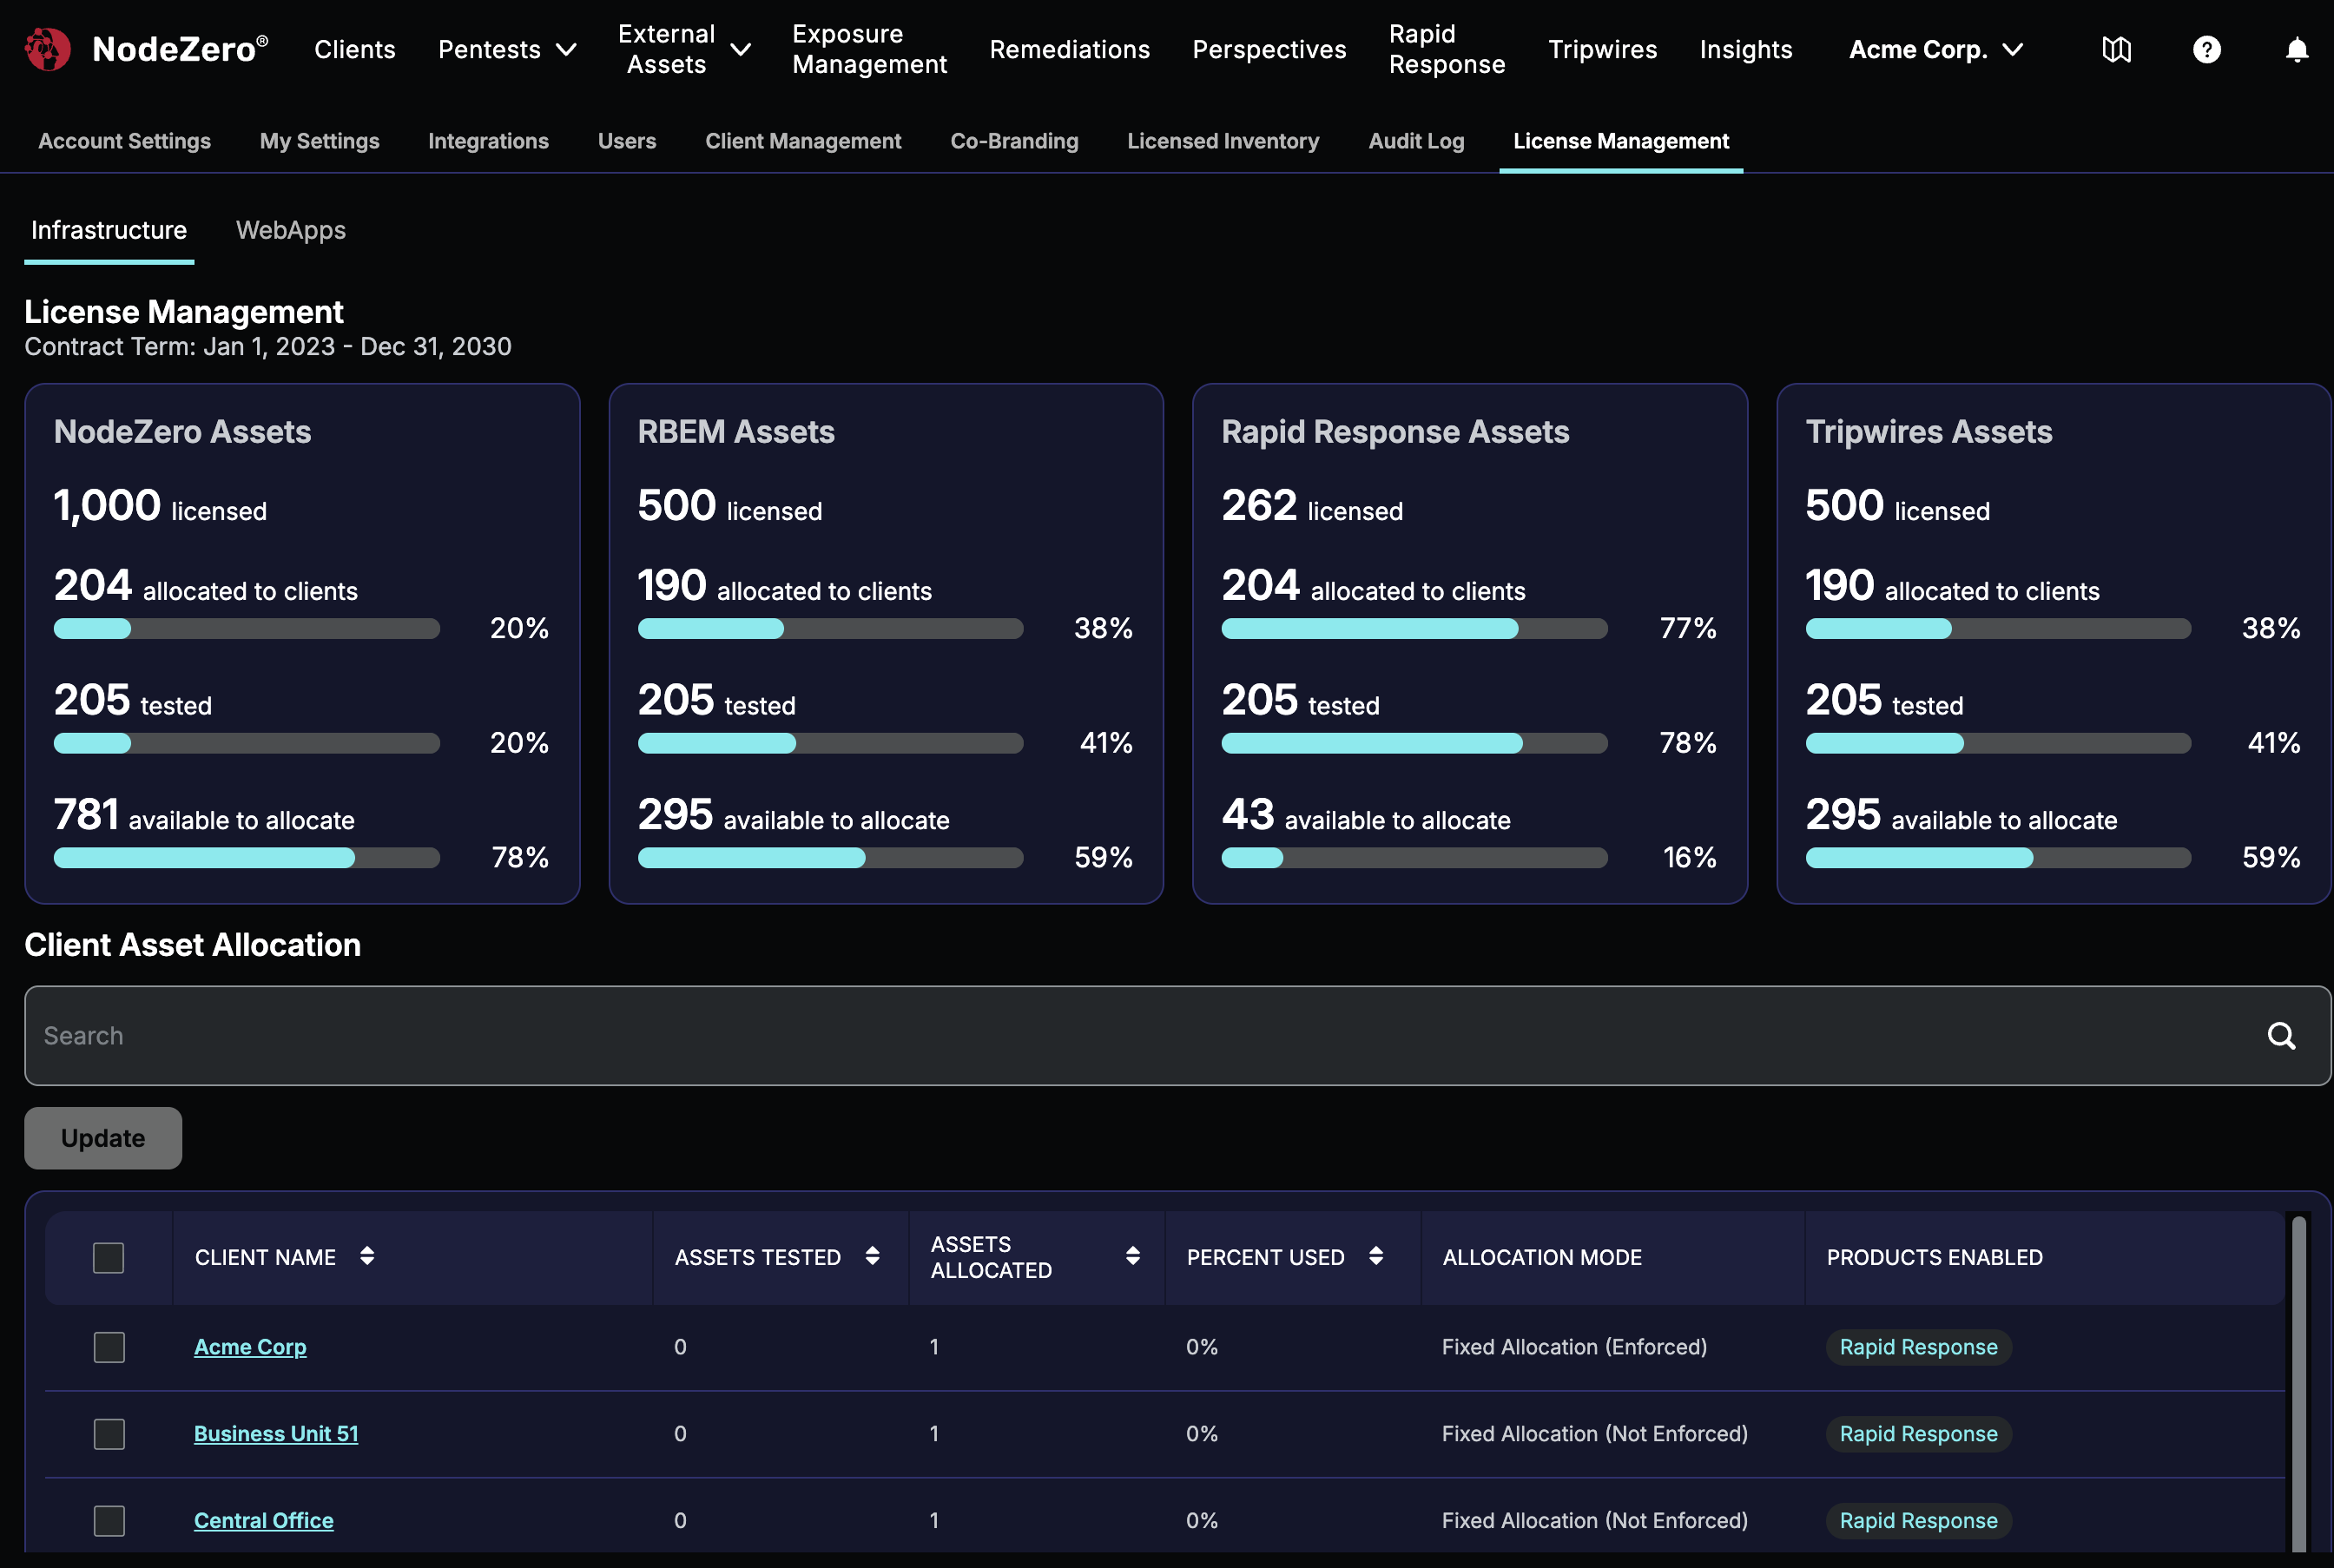
On the Infrastructure tab shown here, the large tiles at the top show license availability and usage in four categories (overall assets, RBVM, Rapid Response, and Tripwires):
-
Your organization's total license count.
-
The number and percentage allocated to clients as a group.
-
The number and percentage tested.
-
The number and percentage available to allocate.
The WebApps tab works similarly, but shows your availability and allocation of WebApp FQDNs (fully qualified domain names). NodeZero treats each FQDN as one licensable application.
Allocations Across Clients
The License Management page's bottom table shows you the number and percentage of allocated assets or applications (WebApps) that each client has tested. Here, it is important to:
-
Monitor the percentage of (allocated) assets or WebApps that each client has scanned. Consider allocating headroom well above current usage.
-
Monitor your organization's total number of tested assets, and the number available to allocate, in each of the four categories shown above. Reach out to your Horizon3 account manager to proactively acquire additional licenses when needed.
Keep in mind these overall constraints on allocating licenses:
-
The number of licenses you can allocate to all clients (combined) is limited by the total pool of licenses purchased and held by the parent account.
-
Separately, granting each client access to Tripwires, Rapid Response, or RBVM features draws down the parent account's pool of licenses for the corresponding feature.
Tripwires, Rapid Response, and RBVM Access
This section is specific to asset licenses (corresponding to the Infrastructure tab in the above screenshot).
For each client, beyond setting the number of assets that can be scanned, you can also assign access to NodeZero Tripwires, Rapid Response, and the RBVM feature set. The RBVM (Risk-Based Vulnerability Management) package includes Insights, Threat Actor Intelligence, High-Value Targeting, Advanced Data Pilfering, and Vulnerability Risk Intelligence.
All or nothing
Selecting the check box for any of these features applies that feature to all assets allocated to this client.
Permissions around these features are subject to some restrictions:
-
Org Admins within each client can see that client's Tripwires, Rapid Response, and RBVM toggles, and these Admins can manage these features only on that client.
-
Only Org Admins, or users designated by the Org Admin for the client account, are enabled to see Notifications for the account, and to see the NodeZero Portal's Tripwires tab.
Updating Client Allocations
From the License Management page, you can finely manage clients' license allocations in two ways:
-
Click an individual Client Name to update that client.
-
Select check boxes for multiple clients, then click the Update button to manage them as a group.
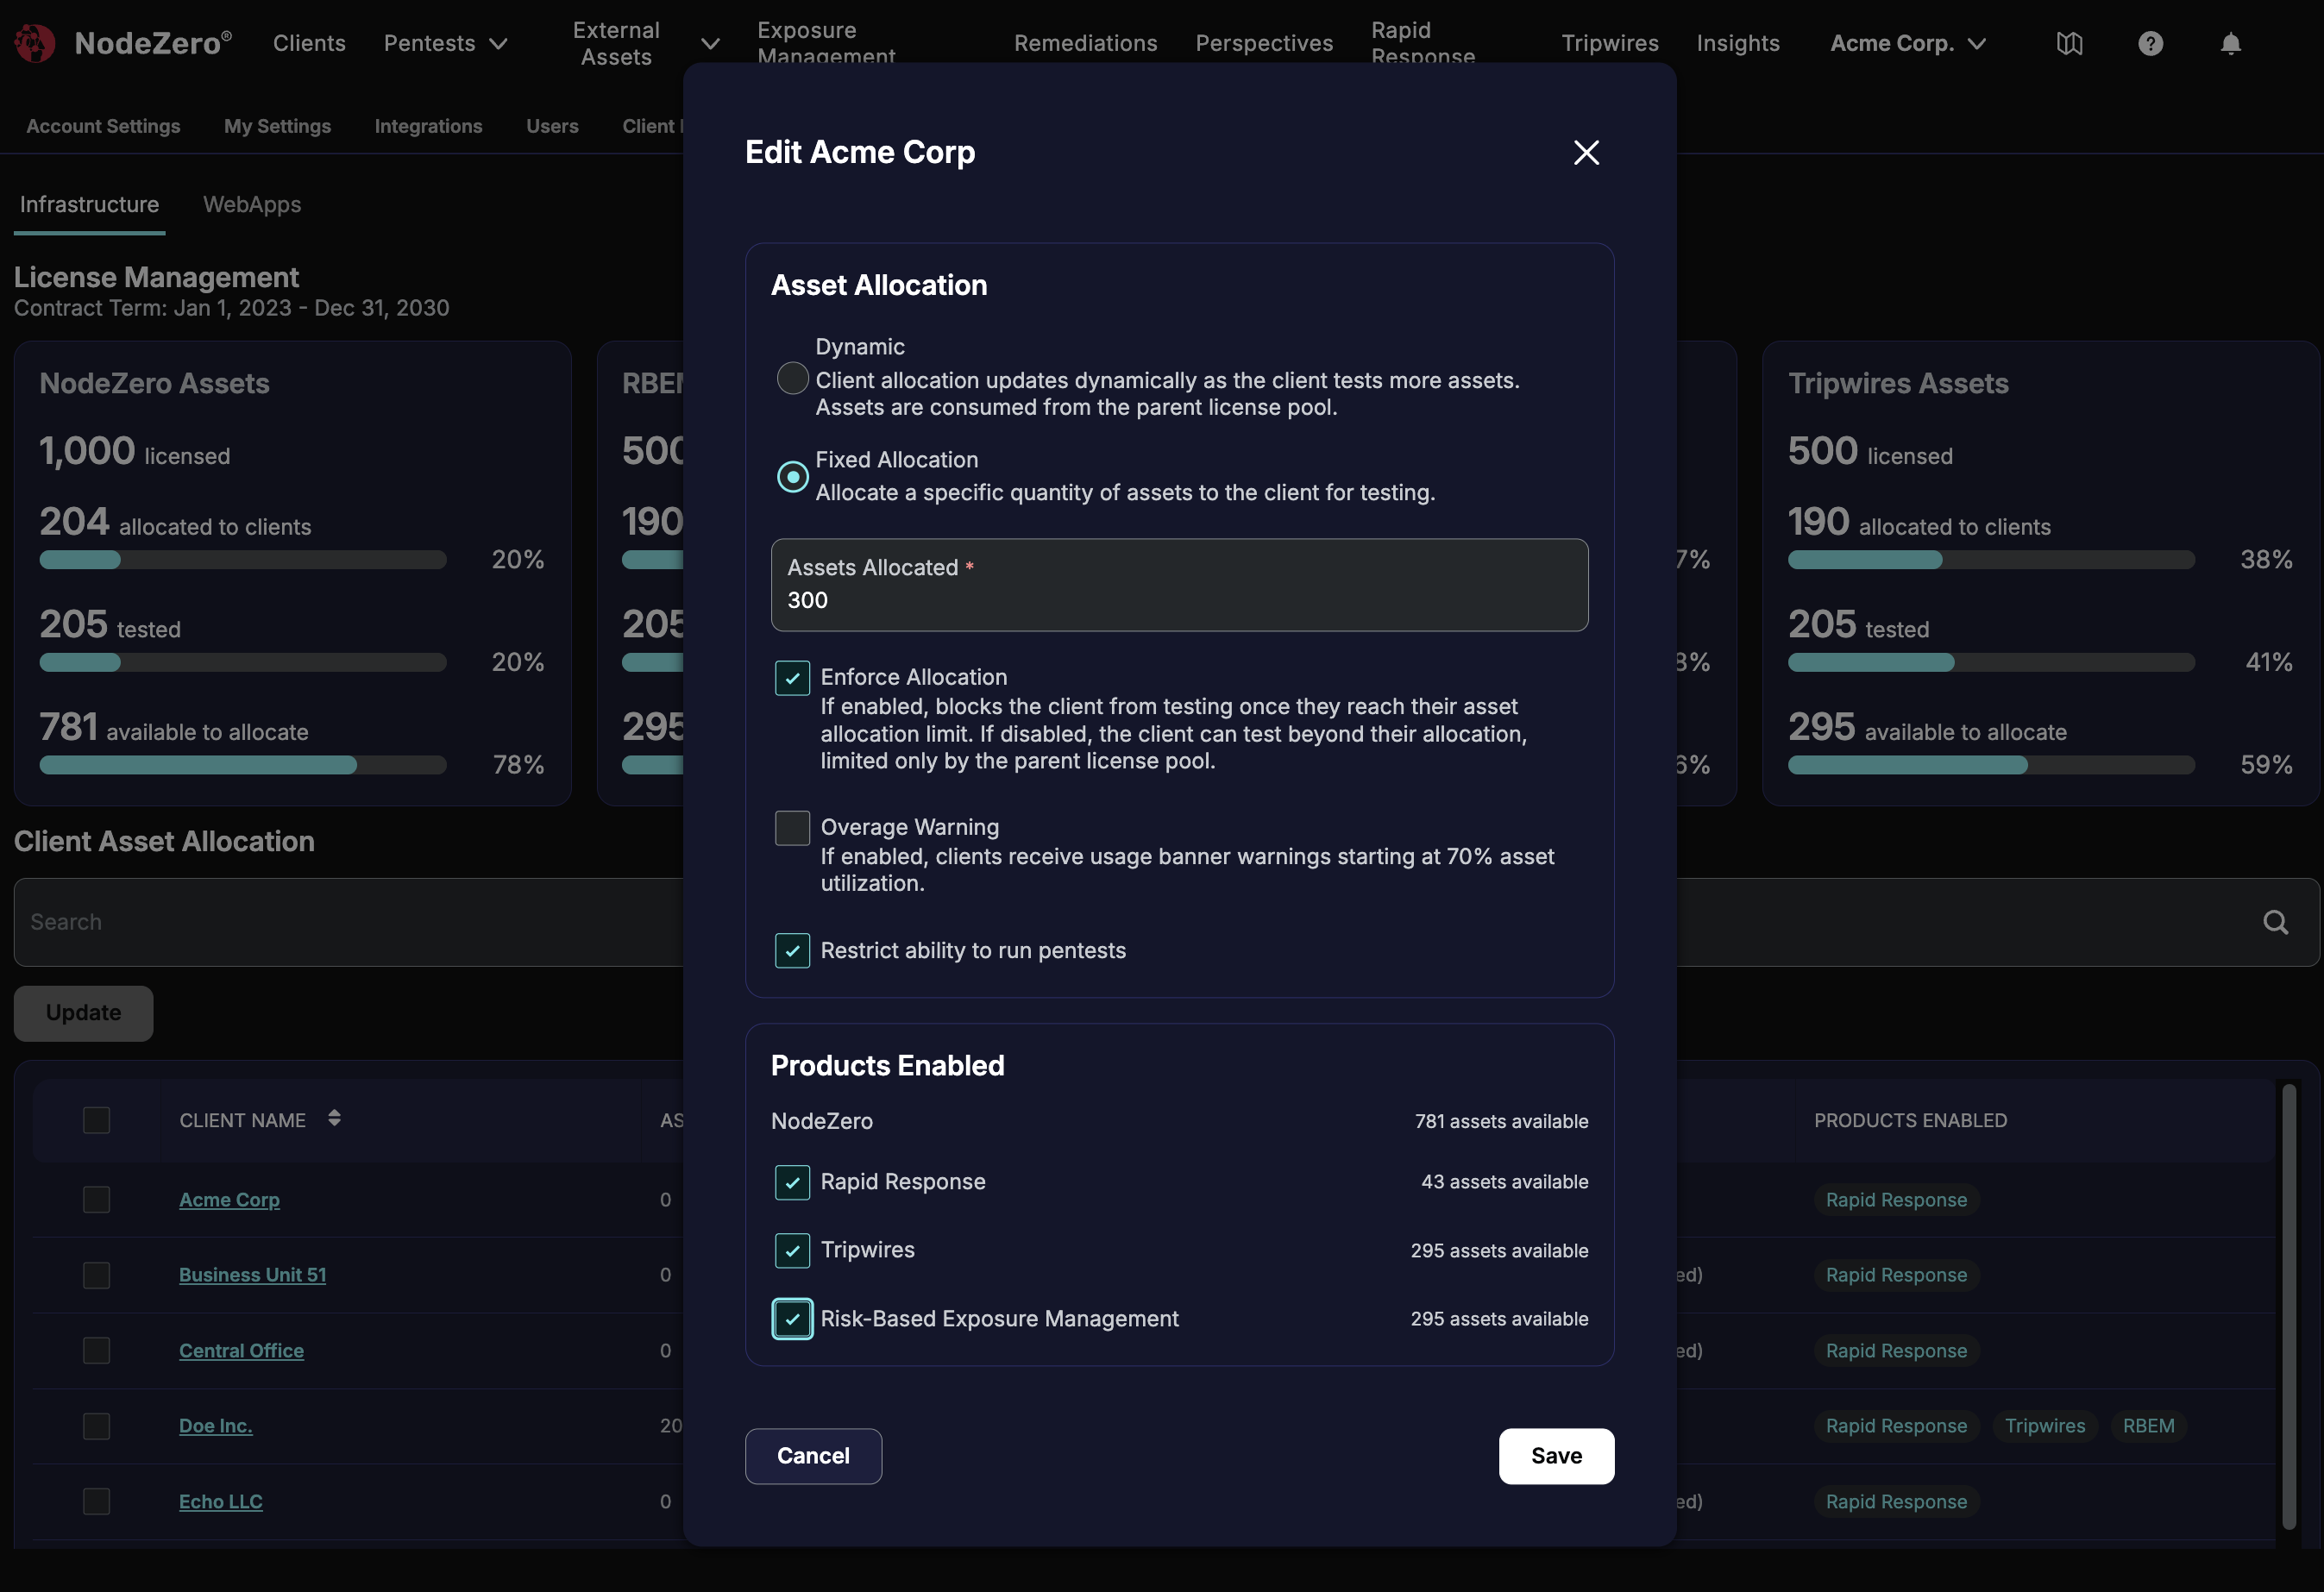
Either option will open a version of the Edit Client(s) modal shown below. Here, you can choose how restrictively to allocate assets to the selected client(s), and can control their access to additional products.
Dynamic or Fixed Allocations
In the modal shown above, a parent account's Admin can allocate licenses to clients in two ways:
-
Dynamic allocation flexibly allocates more licenses from the parent's pool as the client consumes its allocation. These clients will be able to run pentests uninterrupted (subject to your overall licenses limit).
-
Fixed Allocation assigns a specific number of assets or WebApps. This unlocks the Assets Allocated field, where you specify the quantity.
Enabling new clients
Newly created clients start with zero licenses allocated. To enable them to run tests, you must either specify a count of
Selecting Fixed Allocation also unlocks two other options that you can select independently:
-
Enforce Allocation makes your Fixed Allocation a hard limit, preventing further testing unless you allocate more licenses. If you leave this check box cleared, it overrides that limit and essentially makes the
Fixed Allocation work like a Dynamic allocation. -
Overage Warning shows client Admins in-product warning banners, beginning when their tesing has consumed 70% of their allocated licenses. (Whether or not you select this option, you – as the parent Admin – receive email warnings when clients reach usage thresholds.)
A third option in this modal is available with either Dynamic or Fixed Allocation:
- Restrict ability to run pentests stops the selected client(s) from testing, regardless of their unused license allocation. This is a hard brake.
Products Enabled
The Edit Client(s) modal's Products Enabled section provides three additional check boxes, through which you can provide or deny clients' access to NodeZero products beyond pentesting.
As outlined above in Tripwires, Rapid Response, and RBVM Access, this is an all-or-nothing decision: Selecting any of these check boxes allocates your pool's licenses on the corresponding product to all of the assets you've allocated to the client(s).
Providing access is subject to license availability in your parent pool. Therefore, selecting a check box that shows 0 assets available doesn't actually enable the product for this client, until you replenish your pool.
How Asset Reallocation Works
A parent account's Admin can reallocate licenses among clients. See the next section and reallocation details in
Increasing or decreasing the number of licenses allocated to a client also depletes or restores your pool of any additional package features you've enabled on that client.
Assets Inventory
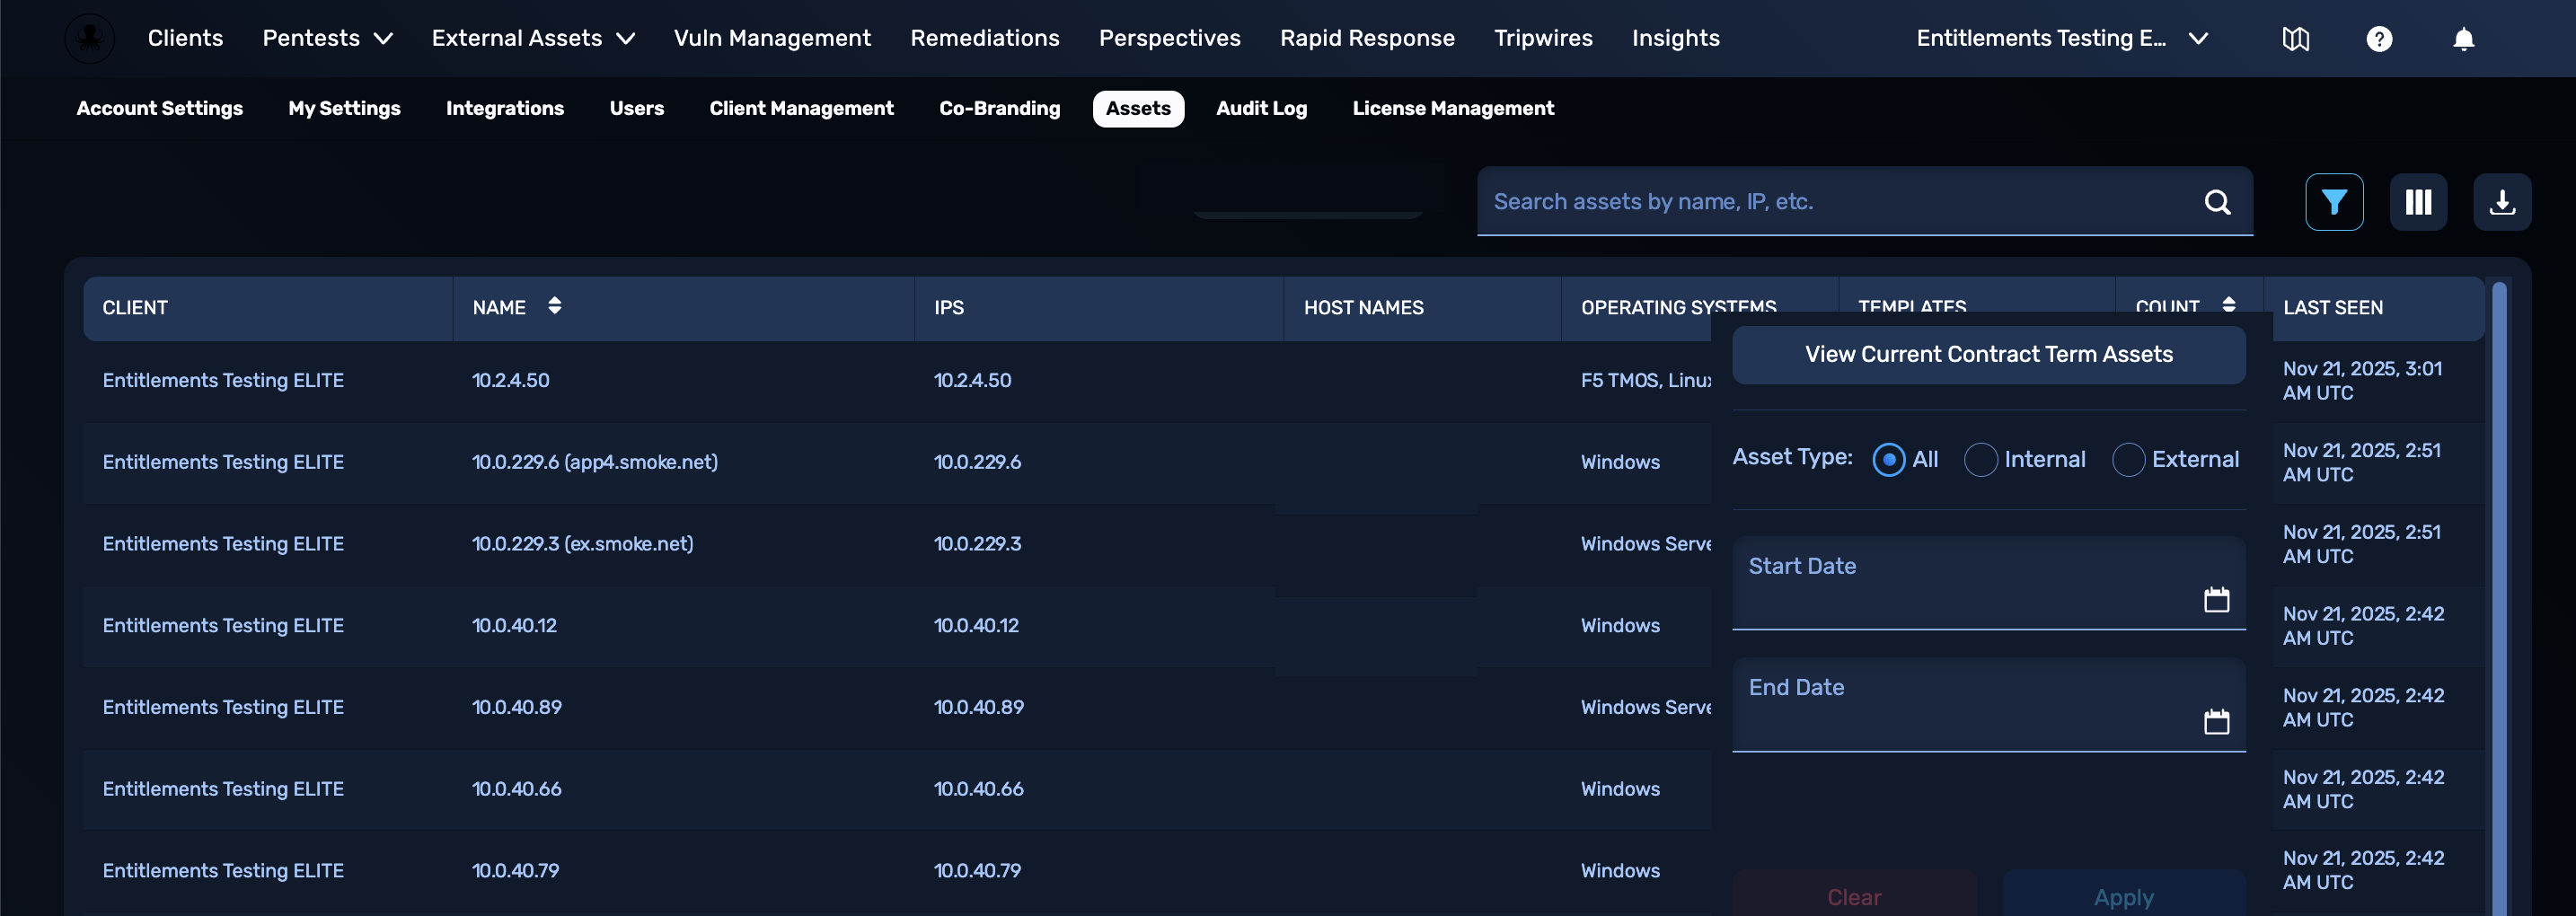
You can examine your overall inventory of Infrastructure assets at Settings > Assets. The table on this page shows details about each asset's name, IPs, host names (where specified), OS, applied templates, count, and date last seen.
As shown below, the Filter button enables you to narrow down the displayed assets by:
- Internal.
- External.
- Date range.
- Current Contract Term authorization.
Click the Filter modal's Apply button to modify the display. The pagination controls at the page's lower-left corner will show the total count of assets matching your current filter conditions.
To view all your total assets again, reopen the Filter modal and click Clear.