Set Up an Azure Cloud Connection
To run an Azure Cloud Pentest, you'll first need to connect NodeZero to your Azure tenant and subscriptions.
Navigate to Cloud Connections
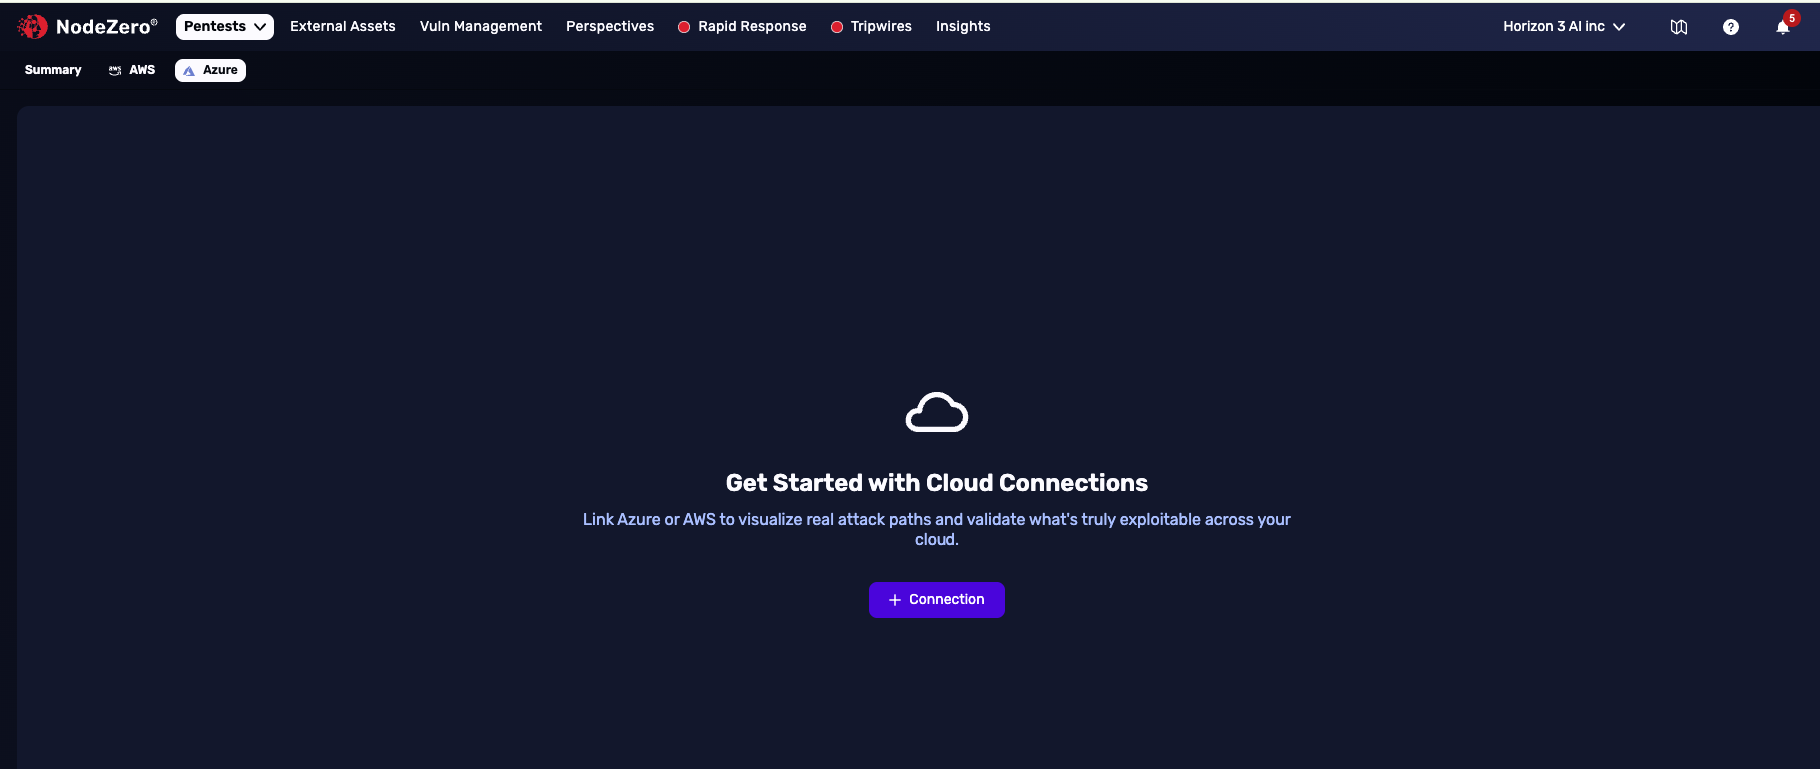
In the NodeZero Portal, navigate to Pentests > Cloud Connections. On your first visit, you'll see the empty state with a + Connection button.
Create an Azure Connection
Open the Create Form
Click + Connection and select Azure from the modal.
Add Tenant and Subscriptions
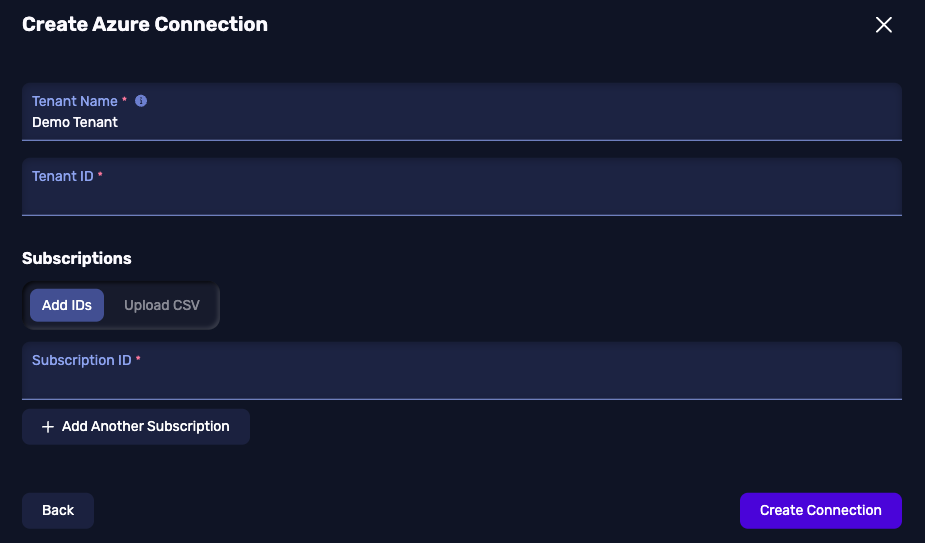
Fill in your Tenant Name and Tenant ID. Then add the subscriptions you want to authorize. You have two options:
Add IDs — enter one or more Subscription IDs directly. Click + Add Another Subscription to add more.
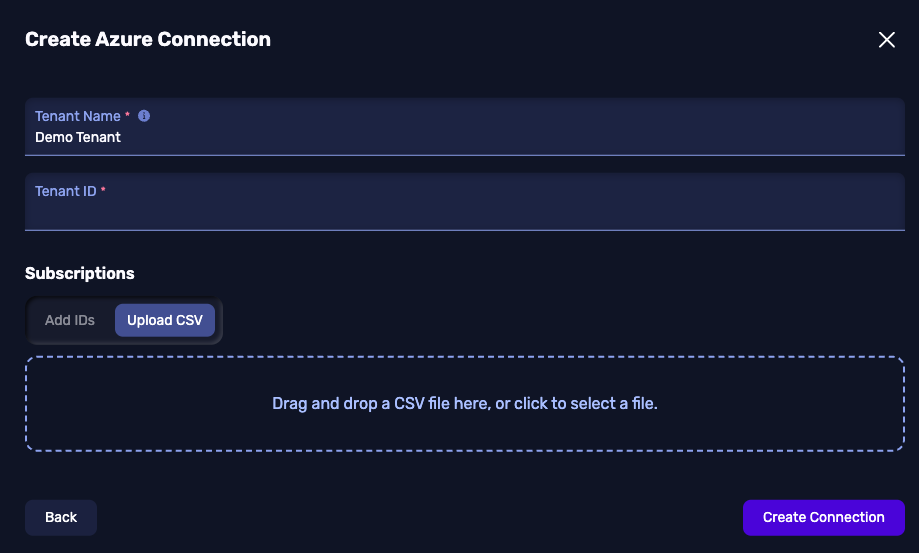
Upload CSV — switch to the Upload CSV tab and drag-and-drop or browse to a CSV file containing your subscription IDs.
Info
Your CSV must have a column header named id. Each row should contain one subscription ID.
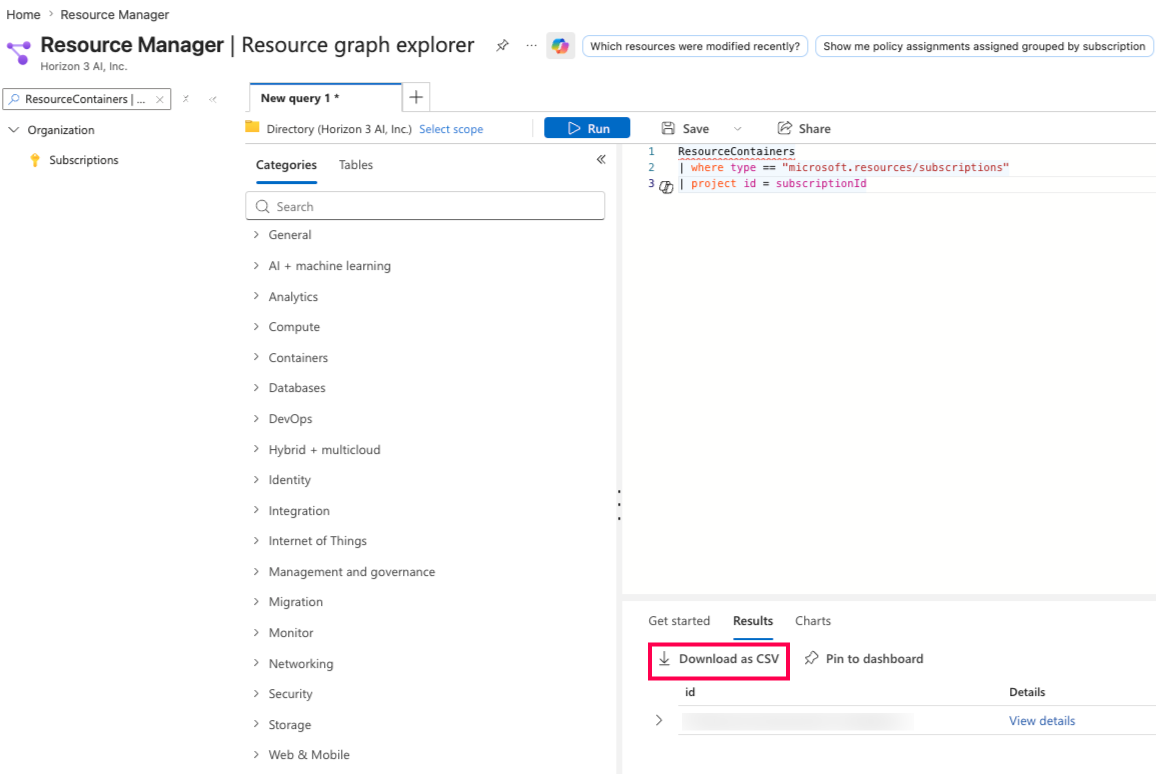
Finding your Subscription IDs
Use Azure Resource Graph Explorer to export all your subscription IDs as a CSV. Run the following query, then click Download as CSV in the Results tab.
ResourceContainers
| where type == "microsoft.resources/subscriptions"
| project id = subscriptionId
Once uploaded, the form shows the file name, size, and number of subscriptions detected.
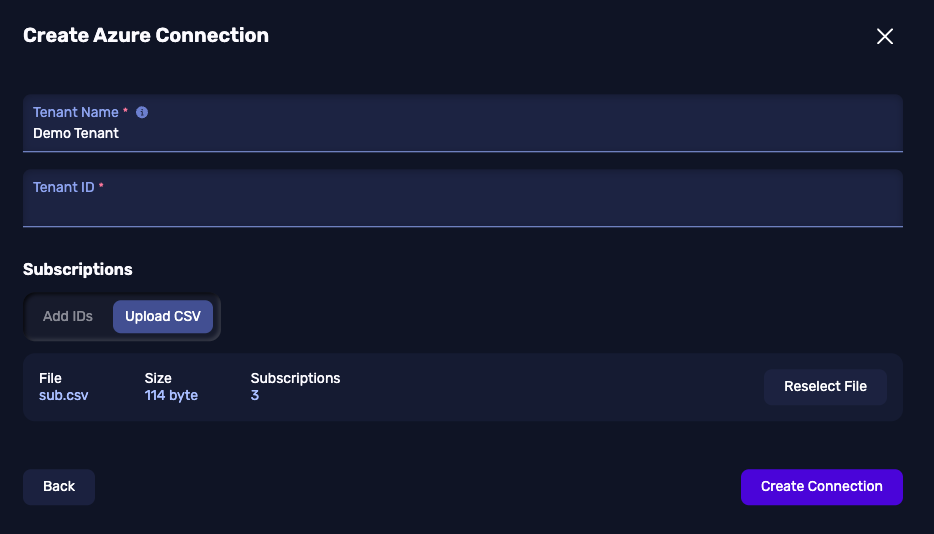
Once you've filled in the form, click Create Connection. You'll be redirected to Azure to grant admin consent.
Grant Admin Consent
Review the permissions requested by Horizon3 Cloud Connector and click Accept.
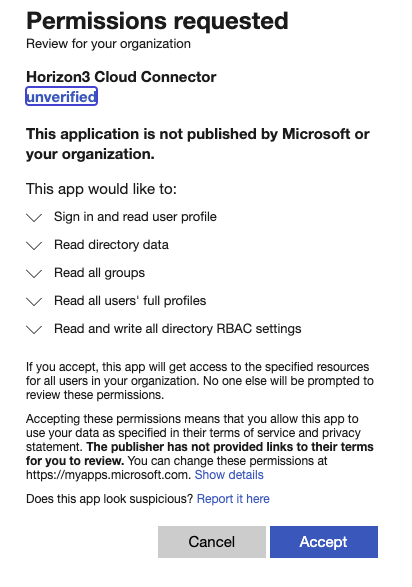
Why does it say 'unverified'?
The Horizon3 Cloud Connector app currently shows as unverified in Microsoft's consent screen. Horizon3 is enrolled in the Microsoft Partner Network (MPN) and the verified publisher badge will appear once our MPN ID is confirmed by Microsoft.
If the consent prompt doesn't appear and you see an error instead, see Admin consent shows AADSTS700016 in the Troubleshooting guide. If you see a Microsoft error page after clicking Accept, see Admin consent returns a Microsoft error page.
After accepting, you'll be redirected back to NodeZero, which immediately checks that the tenant you consented belongs to your organization. See Tenant Verification for what that check does and what to do if it doesn't pass.
Create the Custom Role
NodeZero presents a PowerShell script that creates the "Horizon3 Cloud Connector Custom Role" in your subscriptions. Open Azure Cloud Shell, paste the script, and run it.
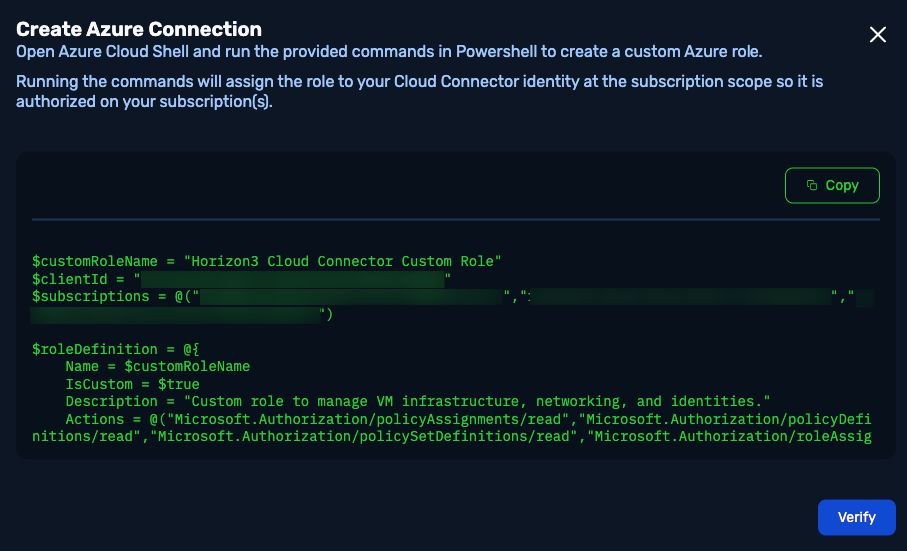
Setting up Azure Cloud Shell for the First Time
When you open Cloud Shell, select PowerShell if prompted to choose a shell type.
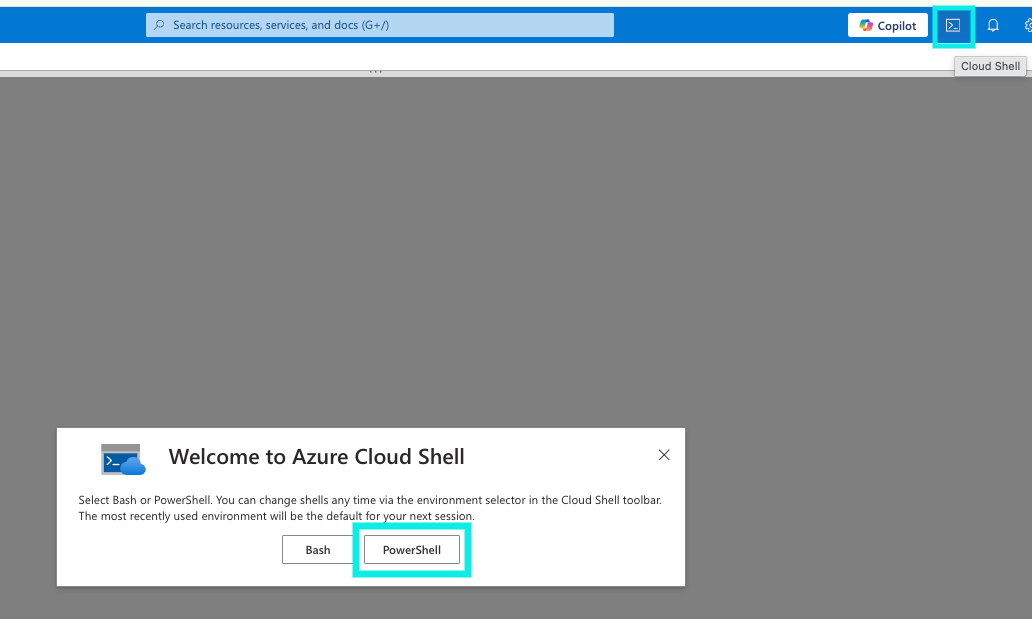
If this is your first time using Cloud Shell, you'll also be asked to select a subscription to get started. Choose any subscription and click Apply.
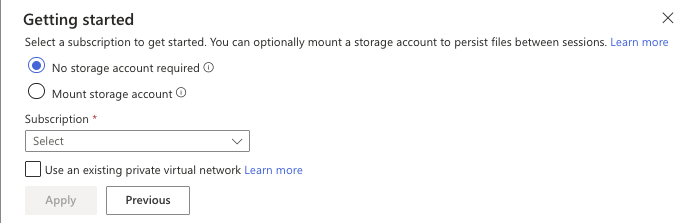
Once the script finishes, return to NodeZero and click Verify.
Verify the Connection
Verification runs as two sequential checks:
- Tenant verification runs automatically as soon as you return from admin consent. NodeZero confirms that the tenant you consented belongs to your organization.
- Permissions verification runs when you click Verify after the custom role script finishes. NodeZero confirms that the role was created and that the managed identity can authenticate.
Tenant Verification
Immediately after admin consent, NodeZero reads the tenant's Microsoft-verified domains from
This check runs before the custom role step described above. Most connections pass it with no action on your part, which is why you were able to continue to the role script. If your check doesn't pass, see
Permissions Verification
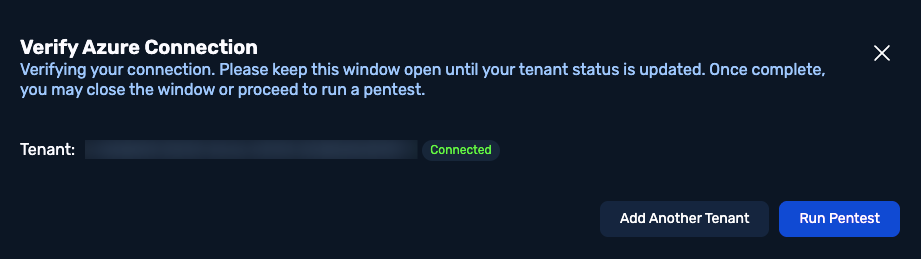
NodeZero will check that the role was created and that the managed identity can authenticate. Keep the window open while verification runs.

Once this check completes, the status will update to Connected. You can now click Run Pentest, or click Add Another Tenant if you need to set up additional connections.
Consent Not Detected
If the connection shows Consent Not Detected, NodeZero hasn't yet observed a completed admin consent for this tenant.
Admin consent must be granted by a Global Administrator of the Azure tenant you're connecting. Consent granted by any other role won't register.
NodeZero polls for about 30 seconds after you return from consent, then stops and offers Check Again. Reaching that point doesn't mean that anything failed — only that consent hadn't registered yet. Use
Tenant Verification Failed
Verification can fail in a few tenant-ownership scenarios, outlined here.
No matching domain: After admin consent, NodeZero reads the tenant's Microsoft-verified domain list from Microsoft Entra, and confirms that it overlaps a domain associated with your NodeZero account. Verification fails when none of the tenant's verified domains match. This protects your account from connections by a tenant you don't own.
Why a legitimate connection can fail: It's not sufficient for the tenant to genuinely be yours — the domains have to line up. Common cases:
- The tenant's only verified domain is its default
.onmicrosoft.comdomain. This is common for organizations that haven't added a custom domain to Microsoft Entra. - Your organization's email domain hasn't been added as a verified domain in that tenant.
- You're connecting a tenant you manage on behalf of another organization — a common case for service providers managing customer tenants. The tenant's verified domains belong to your customer, rather than to your NodeZero account, so the check won't find a match on its own. Horizon3 Support can help you get these connections set up, as described below.
The connection is removed when tenant verification fails
NodeZero deletes the connection and the application registration behind it, so the application can no longer be used to access your tenant. A disabled Horizon3 Cloud Connector enterprise app entry remains in your Azure tenant, and must be removed manually.
Retrying the same connection won't work — the connection no longer exists. Creating it again from scratch with Start Over is the only path forward, and it requires a fresh admin consent.
How to proceed if tenant verification fails:
- Contact Horizon3 Support before you create the connection again. Support can help determine why the domains didn't line up, and what's needed for the tenant to verify against your account. Include the tenant name and Azure Tenant ID you were connecting.
- Remove the leftover enterprise app from your tenant, by following Delete the Enterprise App. Creating the connection again registers a new application. If you first clear the old entry, this keeps a dead app from accumulating alongside your new app.
What's Next
Your connection now appears on the Cloud Connections page, showing the tenant name, Azure Tenant ID, authorization timestamp, and a table of authorized subscriptions.
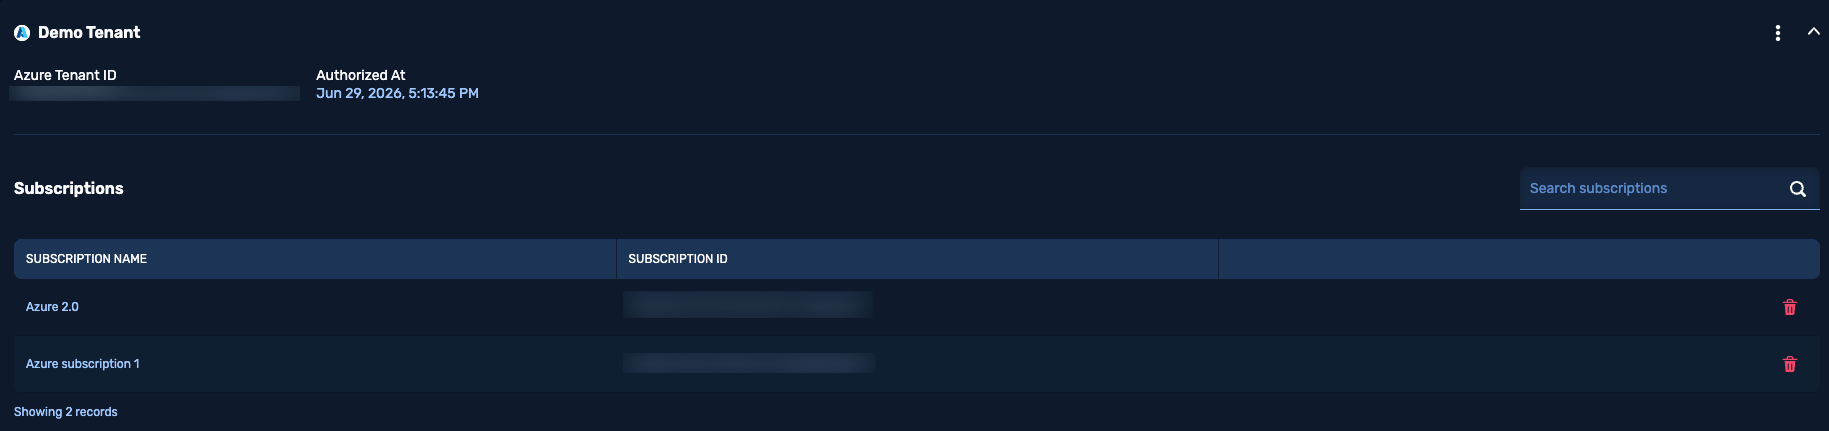
From here you can:
- Run an Azure Cloud Pentest
- Manage your Azure connection — add or remove subscriptions, verify, repair, or delete the connection