NodeZero Host Virtual Machine (OVA/VHD)
The NodeZero Host virtual appliance is a small virtual machine based on a preconfigured Ubuntu 24.04 installation. It’s designed to execute NodeZero pentests and bundles tools that facilitate pentest execution, as well as debug and maintenance.
Downloads
Tip
Always verify that the downloaded files come from Horizon3.
VMWare/Virtualbox Importable OVA
Windows Hyper-V Importable VHD
Specifications
The NodeZero host virtual machine comes preconfigured to use these resources:
- 2 x CPUs
- 8GB of RAM
- 128GB of disk (Minimum Required: 40GB)
- Bridged network adapter
Outbound Traffic
If your environment restricts access to external sites through an outbound proxy or similar mechanism, please make sure that this mechanism allows connections to the following sites:
| Port/Protocol | Endpoints | Purpose |
|---|---|---|
| HTTPS - 443/TCP | *.ubuntu.com *.canonical.com downloads.horizon3ai.com |
API access, authentication, storage, updates, and container registry |
OVA Setup
After downloading the NodeZero OVA, follow these steps to set it up and configure your environment.
Installation
Installing the virtual machine is as simple as importing the OVA file into your virtualization environment. Below, we provide step-by-step instructions for deploying NodeZero using VMWare vSphere, Oracle VirtualBox or Hyper-V.
Choose your virtualization environment and follow the view step-by-step instructions:
Deploying NodeZero on VMWare vSphere
The vSphere client is one of VMWare’s virtual environment management solutions. You can find more information on the client itself in VMWare’s documentation.
Note
The following steps are for vSphere client version 7.0.3.00500.
After downloading and verifying the most recent NodeZero-####.ova file, follow these steps to import and launch the NodeZero host virtual machine.
- Log into your
VMware vSphereclient. - Open the
Actionsmenu and selectDeploy OVF Template. - Choose
Local File, then clickUpload Filesand select the downloaded OVA file. - (Optional) Rename the VM and select a deployment location. Click
Next. - Select
compute resourcesfor the VM. ClickNext. - Verify the import settings and ensure the signature is from
Horizon3.ai. ClickNext. - Choose the
storage destinationfor the VM. ClickNext. - Select the
networkfor the VM. ClickNext. - Review all selections, then click
Finishto start deployment. - Once deployment completes, select the VM from the list and click
Power Onto launch it.
Deploying NodeZero on VirtualBox
Oracle's VirtualBox is a powerful open-source virtualization solution for running multiple operating systems on a single physical machine. You can find more information in VirtualBox documentation.
After downloading and verifying the most recent NodeZero-####.ova file, follow these steps to import and launch the NodeZero host virtual machine.
- Open VirtualBox.
- Click on
Tools, thenImport. - Enter the location of the OVA file. Click
Continue. - Click
Import, and wait for it to complete. - Make sure the network is set to use a
bridged network adapter. - Select the newly imported NodeZero virtual machine from the list on the left.
- Click
Settings, thenNetwork. - Confirm that
Attached tois set toBridged Adapter. - Confirm that
Nameis set to the name of the adapter connected to your internal network. - Click
OK. - Select the NodeZero virtual machine from the list on the left.
- Launch the VM by clicking
Start.
Deploying NodeZero on Windows Hyper-V
Hyper-V is Windows' native virtualization platform for creating and managing virtual machines on Windows systems. You can find more information in Hyper-V documentation.
After downloading and verifying the most recent NodeZero-####.vhd file, follow these steps to import and launch the NodeZero host virtual machine.
- Open and enable Hyper-V.
- Ensure both
Management ToolsandPlatformare enabled. - Create a New Virtual Machine in Hyper-V Manager by going to
Action > New > Virtual Machine.... - Enter a name for the virtual machine in the New Virtual Machine Wizard.
- Select
Generation 1as the virtual machine type. - To allocate memory, set
Startup Memoryto at least8192 MB(8GB). - Dynamic memory can be enabled or disabled based on your environment.
-
To configure the network, select a production network with a valid IP (DHCP or Static).
Hyper-V's default switch will NOT work!
-
To attach the Virtual Hard Disk (VHD), choose
Use an existing virtual hard disk. Then browse to theNodeZero-xxx.vhdfile you downloaded. - Review and confirm all configurations, then click
Finish. - Start the VM
- In Hyper-V Manager, select the new VM and click
Connect. - In the VM window, click
Startto initialize the NodeZero host.
- In Hyper-V Manager, select the new VM and click
Accessing Your OVA Host
Choose your virtualization environment to set up the initial connection:
Initial connection on VMWare vSphere
Once the NodeZero host is powered on, you can connect using either the Web Console or Remote Console from the vSphere client interface.
Initial connection on VirtualBox / Hyper-V
After starting the VM, a display window will appear, showing the operating system loading screen.
1. First-Time Login & Password Update
Regardless of the platform, once the OS has fully loaded, you will see a login screen similar to this:
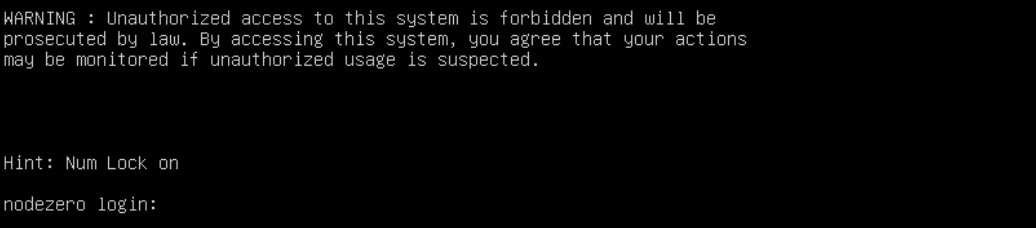
Login screen
When launching the NodeZero Host for the first time, SSH password access is disabled until the initial login is completed and the default password is updated.
Initial Login Credentials
Use the following credentials to log in:
- Username:
nodezero - Password:
nodezero
2. Password Update Process
Upon successful login, you will see the following prompt:
You are required to change your password immediately (administrator enforced)
Changing password for nodezero.

Current password:
- Enter the current password (nodezero) and press
Enter. - When prompted for the
New password:, enter a secure password and pressEnter. - When prompted to
Retype new password:, confirm by entering the same password, and pressEnter.

Initial login and password-change prompt
3. Select Region
Once you've successfully changed the password, you must select the region to which the host will connect.
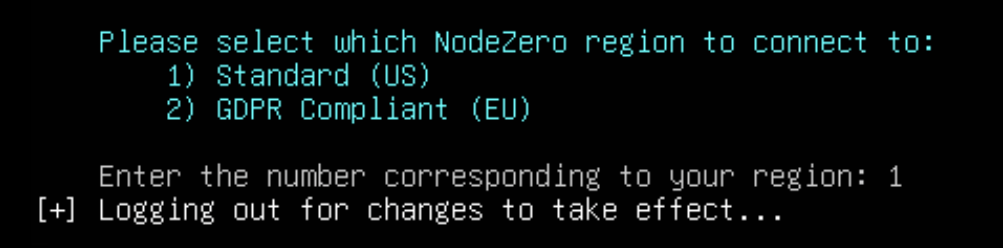
Region selection prompt
After specifying which region the NodeZero host will connect to, log out and back into the system for the change to take effect. Upon logging in, a splash screen will display:
-
eth0
-
A list of Runner services that are active
-
A status of connections to Horizon3.ai endpoints
At this point, SSH has been enabled on the host, which is accessible using an SSH client. Below are screenshots of the login screen when nothing is configured on the host, and then when the host is fully set up.
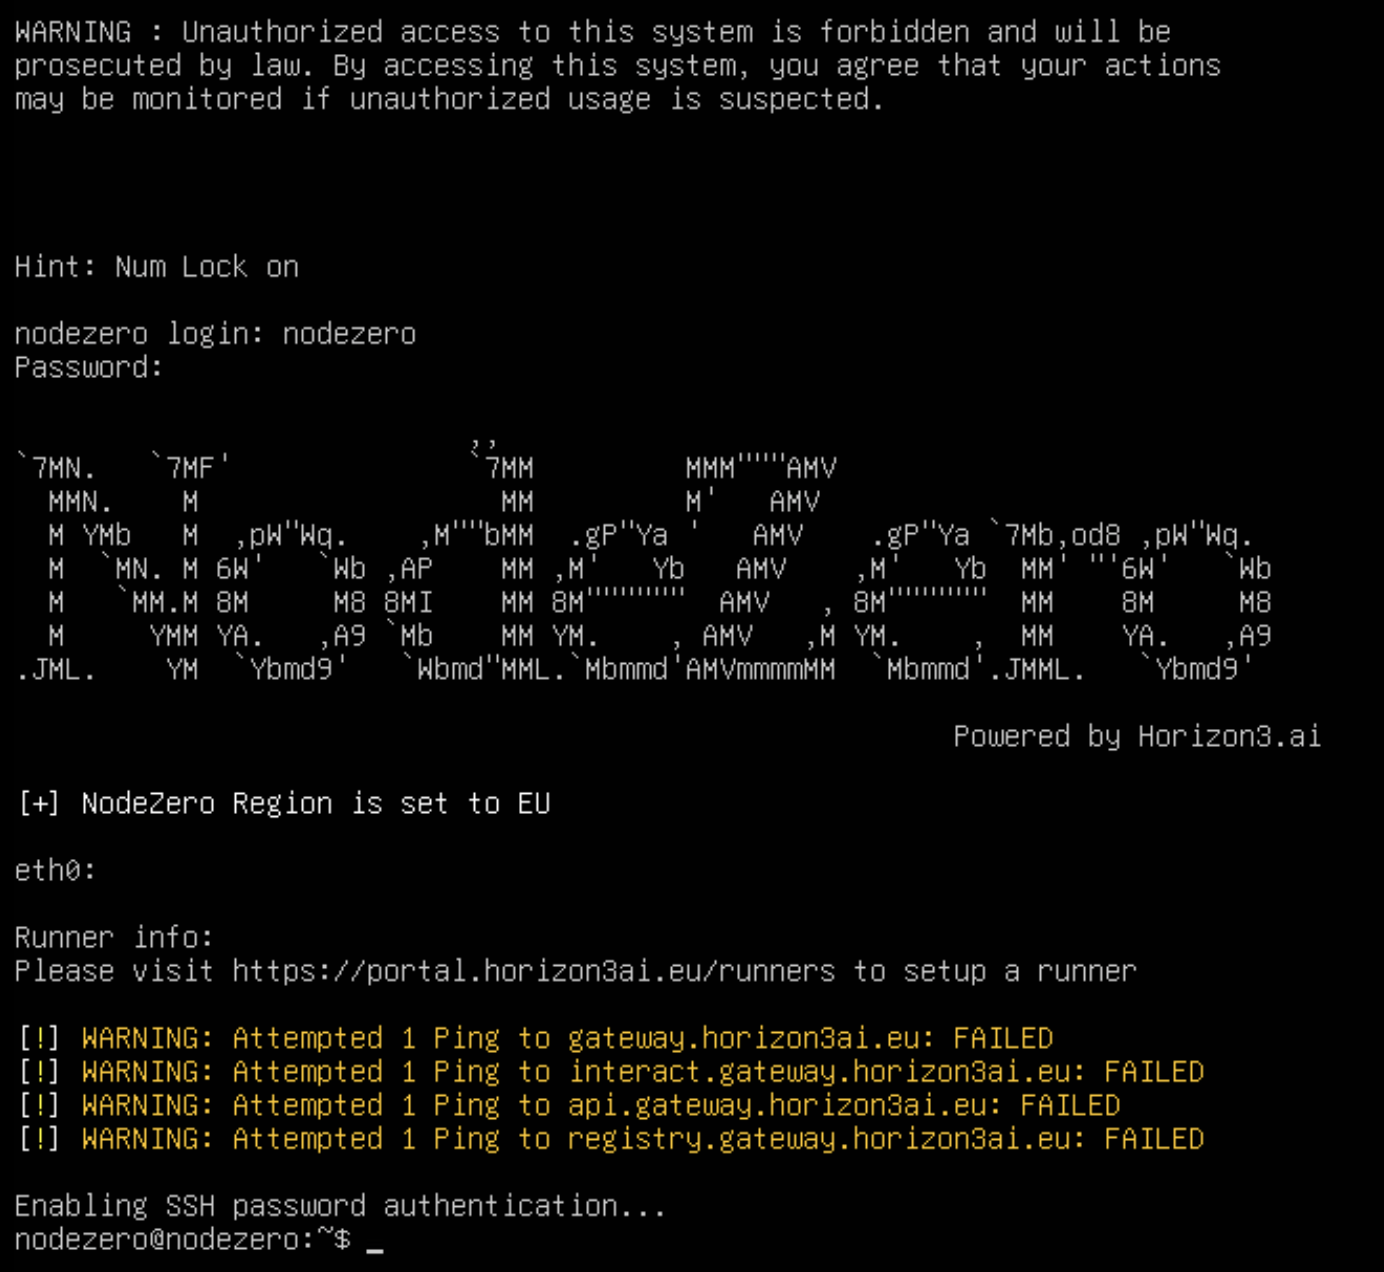
Screenshot of the OVA login with no network or Runners set up
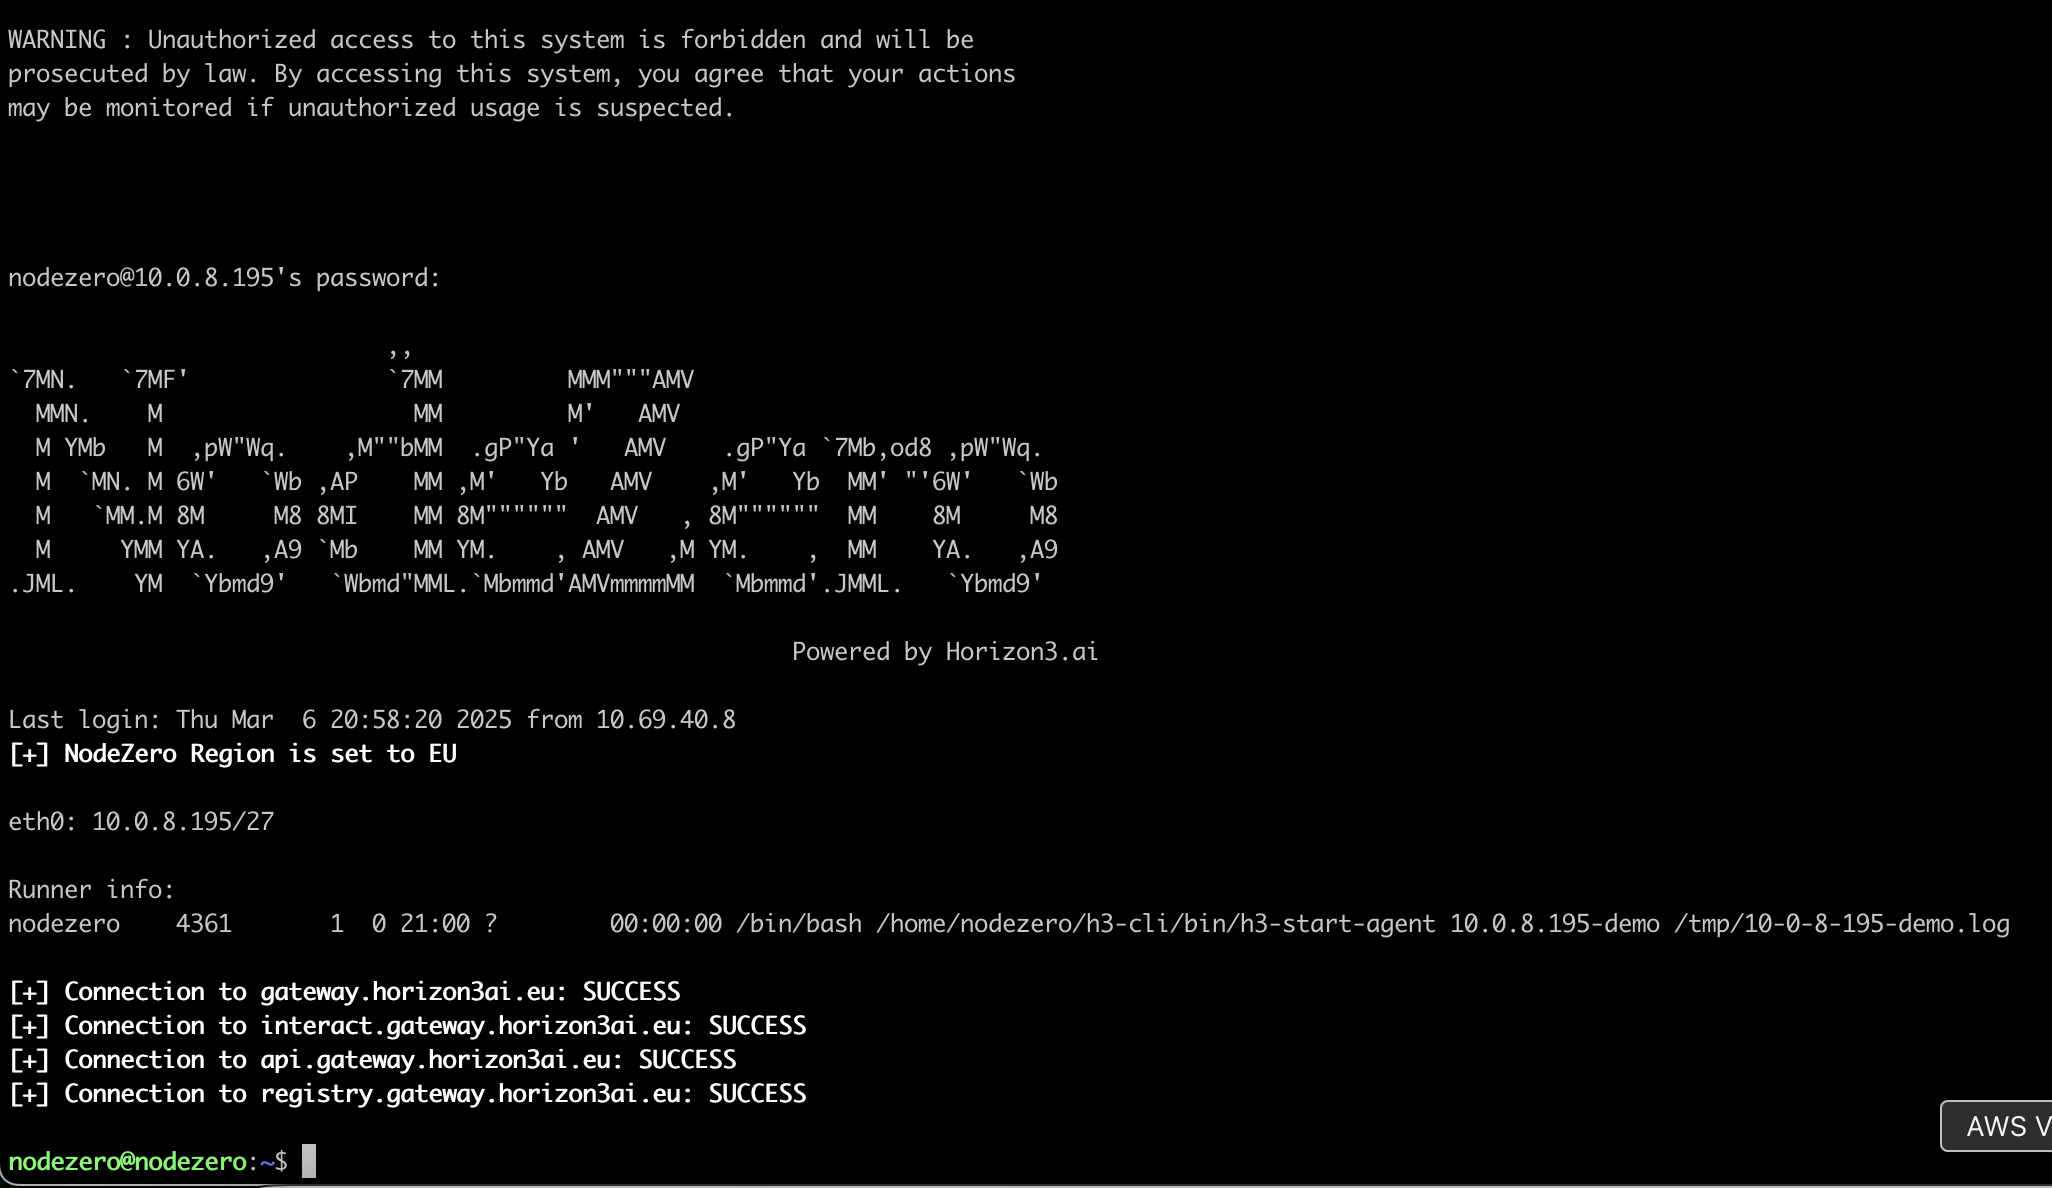
Screenshot of the OVA login when a network is set up and a Runner is added to the host.
4. SSH Access
To connect over SSH with Linux or MacOS, run the command below, replacing <IP_ADDRESS> with the one shown in the login screen after eth0.
ssh nodezero@<IP_ADDRESS>
If using Windows, a client like PuTTY will be needed to connect. Fill out the Host Name (or IP Address) field with the address shown in the login screen.
Additional setup options
The n0 utility helps with configuring the host with a static ip, using a proxy, downloading the latest CLI, and setting timezones as well as running the checkenv script
EDRs on NodeZero Host
Do not install or configure any EDR (Endpoint Detection and Response) services on the NodeZero host. EDRs are known to disable NodeZero once they detect the deliberately malicious actions that our tests conduct. To get a complete test of your overall environment, NodeZero attacks must launch from the host machine unimpeded.
Running a NodeZero Pentest
- Log into the NodeZero Portal.
- Create a new pentest, providing the relevant setup information.
- Copy and paste the curl command from the Portal into the shell of a NodeZero host.
- The pentest starts executing, with indicators like those in the screenshot below.
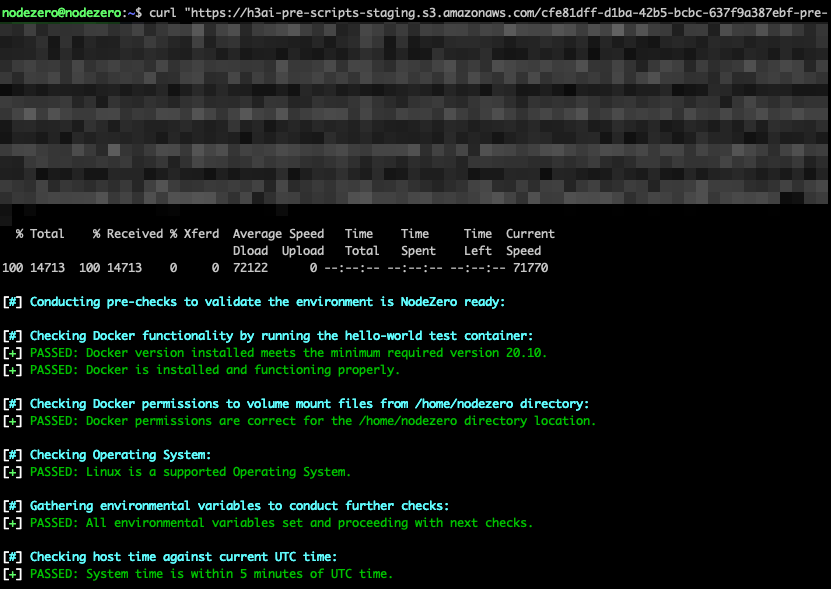
Initial output from pentest script
Updating the OVA
To update your OVA to most-current version, run the n0 utility and select option 5. (CLI command: n0 -n 5.)
Automating NodeZero
You can automate running NodeZero by using h3-cli and setting up Runners on the host.