Azure
Warning
This guide should be used as a functional example only. Identity Admins should follow their Company's policies and best practices when implementing Single Sign-On (SSO).
Similarly, because these guides are for services Horizon3 does not control, screenshots and configuration options may be different then what you see here.
All sections of this page should be completed by someone with the Identity Team Admin Persona
Create Azure Enterprise Application
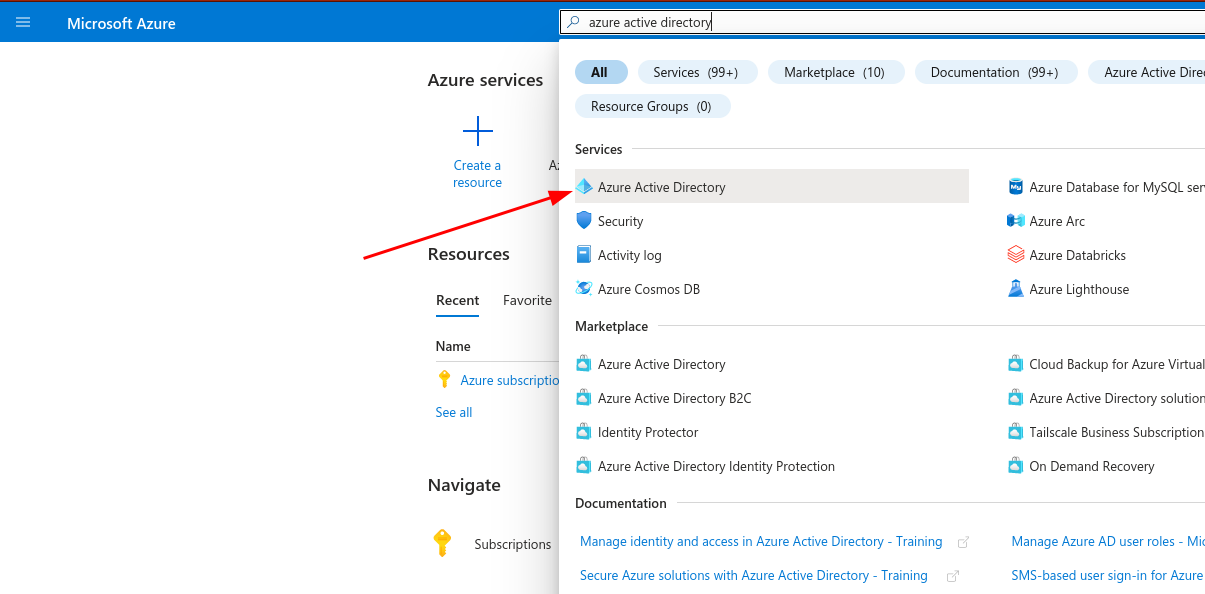
Log into Azure Portal and browse to the "Azure Active Directory" service.
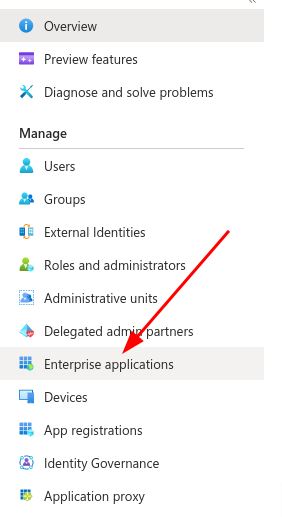
In the left hand menu under the "Manage" section, click "Enterprise applications".
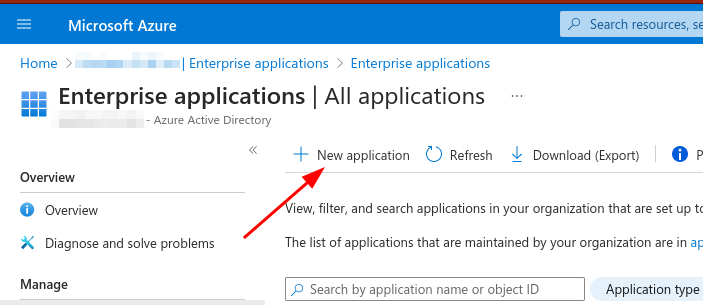
Then click "New Application".
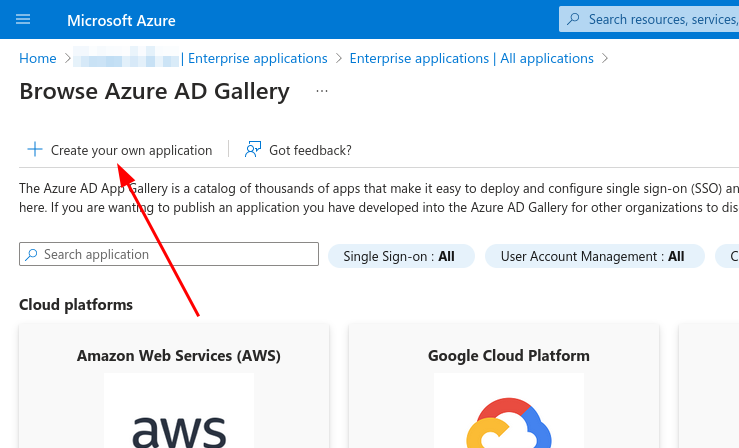
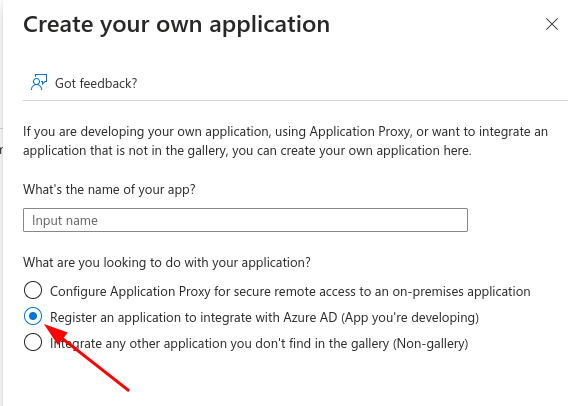
Then click "Create your own application".
Required Role
You will need to have one of the following Azure AD roles in order to create a new application
Global Administrator
Application Administrator
Name your app "NodeZero Portal".
Select the "Register an application to integrate with Azure AD (App you're developing)" option.
Click Create.
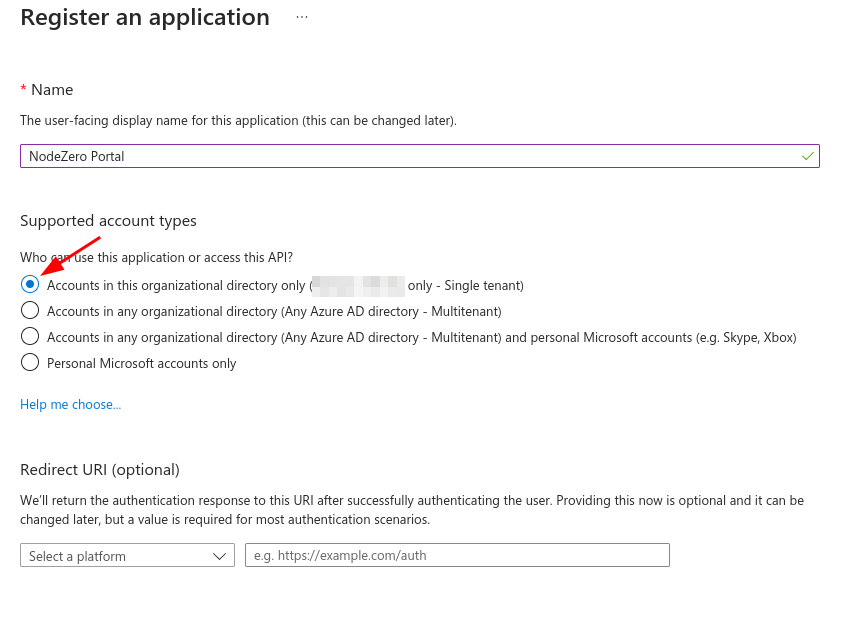
On the "Register an application" page, you can choose to set a different user-facing name for the app, if desired.
Ensure the "Supported account types" option is set to "Single tenant".
Leave the "Redirect URI" section blank for now.
Click Register.
Copy Client ID
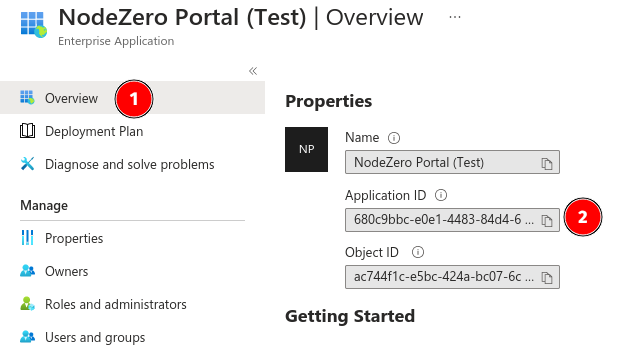
After registering the app, you'll be taken back to the "Browse Azure AD Gallery" page. Navigate back to the Enterprise applications page, find your newly created app, and click it.
On the Overview page, save the Application ID. This is the Client ID that you will need to provide to your Portal Org Admin later.
Configure Single Sign-On
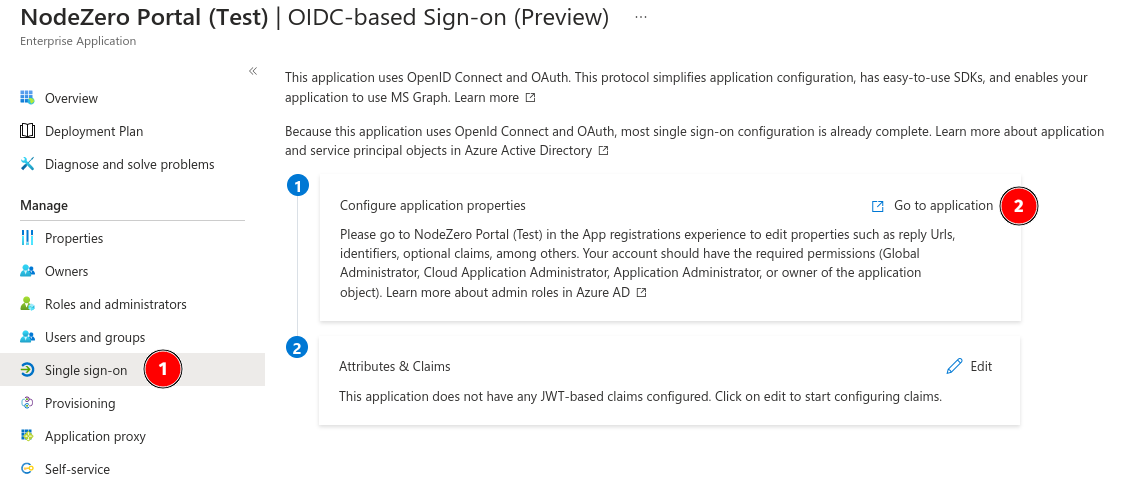
Under the Manage section of the left hand menu, click Single sign-on.
Click Go to application.
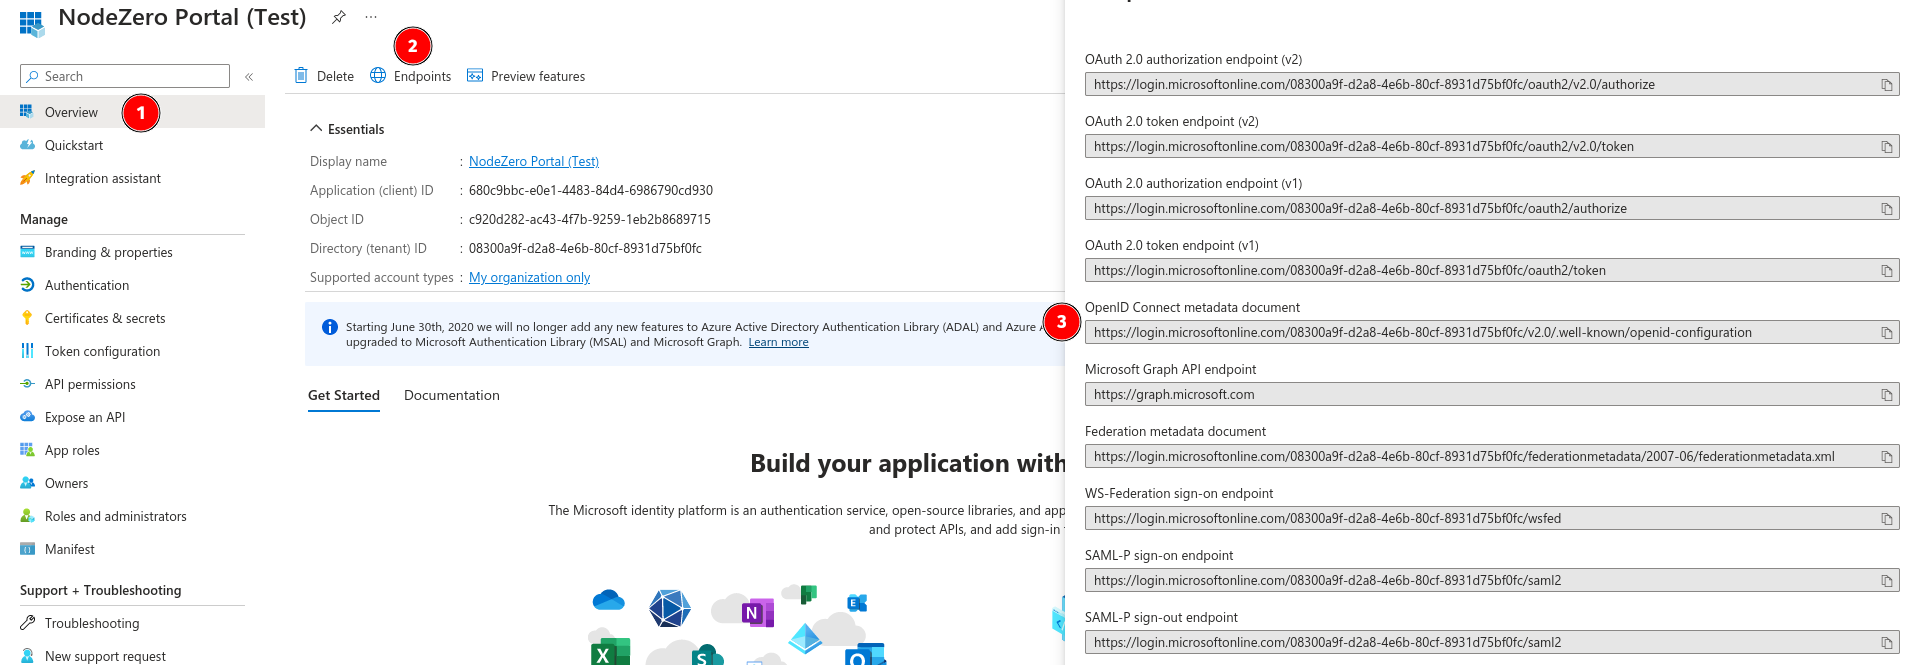
Copy Issuer URL
On the new Overview page, click the Endpoints tab and copy the OpenID Connect metadata document value. This is this Issuer URL that you will need to
provide to your Portal Org Admin later.
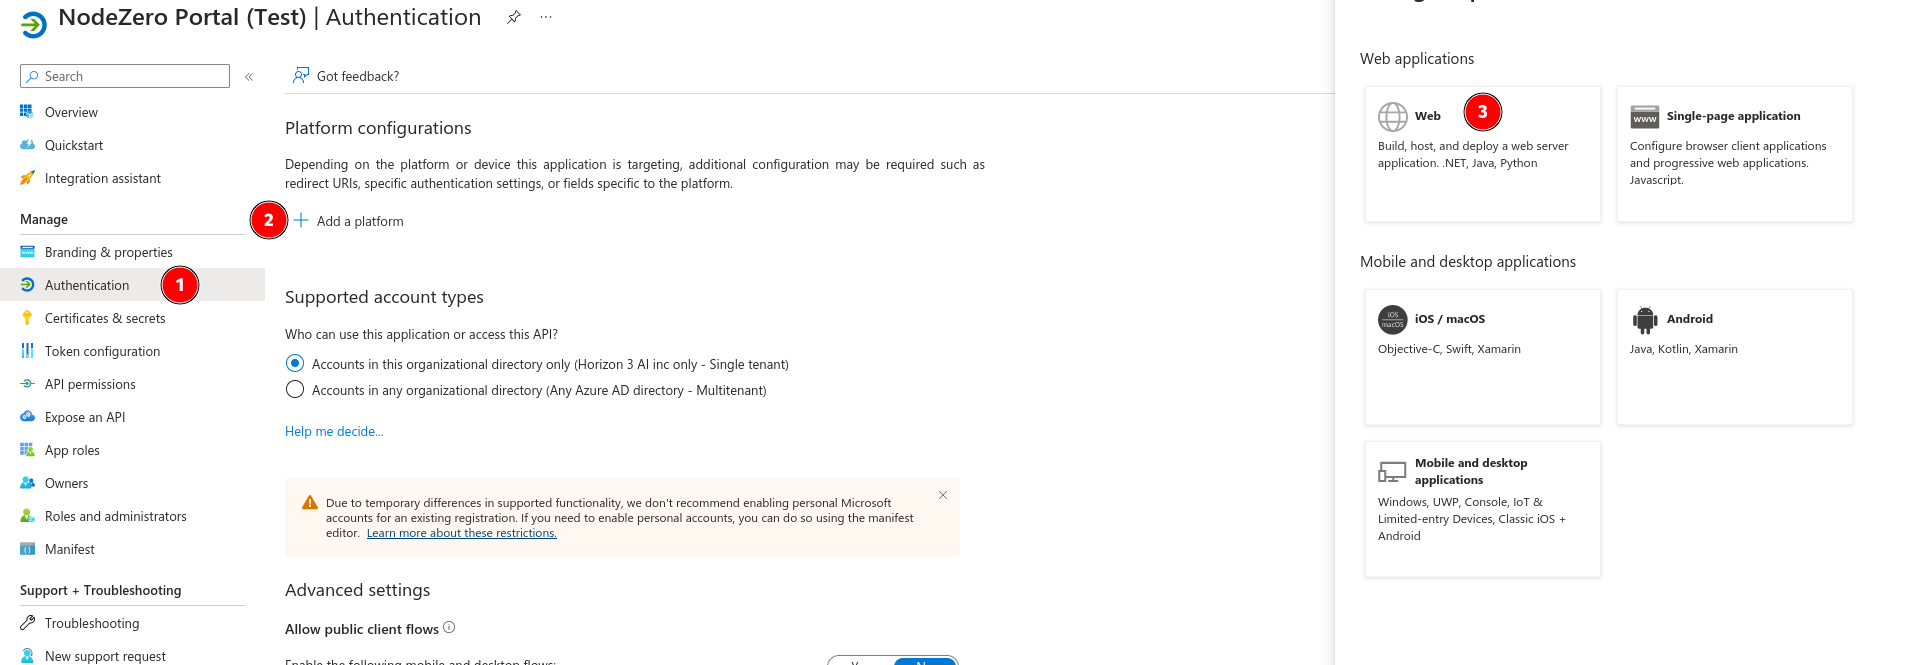
Configure Authentication
Under the Manage section, click Authentication.
Click Add a platform under the "Platform configurations" section.
In the form that opens to the right, click the Web button under the "Web applications" section.
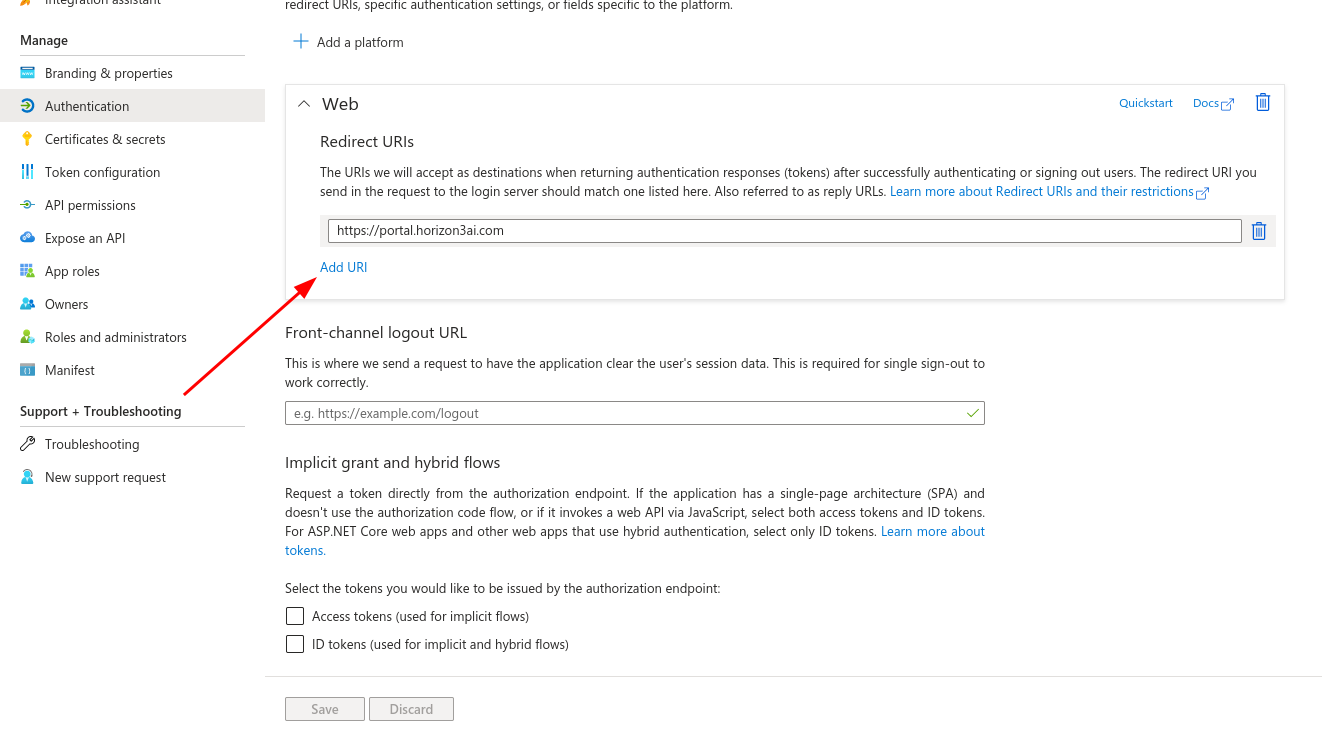
Use the information in the below table to fill out the "Redirect URIs" field. Be sure to select the correct tab based on which regional Portal your users access.
| Field | Value |
|---|---|
| Sign-in redirect URIs | https://portal.horizon3ai.com https://auth.horizon3ai.com/oauth2/idpresponse |
| Field | Value |
|---|---|
| Sign-in redirect URIs | https://portal.horizon3ai.eu https://auth.horizon3ai.eu/oauth2/idpresponse |
Adding multiple Sign-in redirect URIs
The initial form appears to only allow you to enter a single URI. Enter the first URI from the appropriate
table below, click Configure, then click the Add URI link in the Web > Redirect URIs section on the main
page. Enter the 2nd URI and click Save.
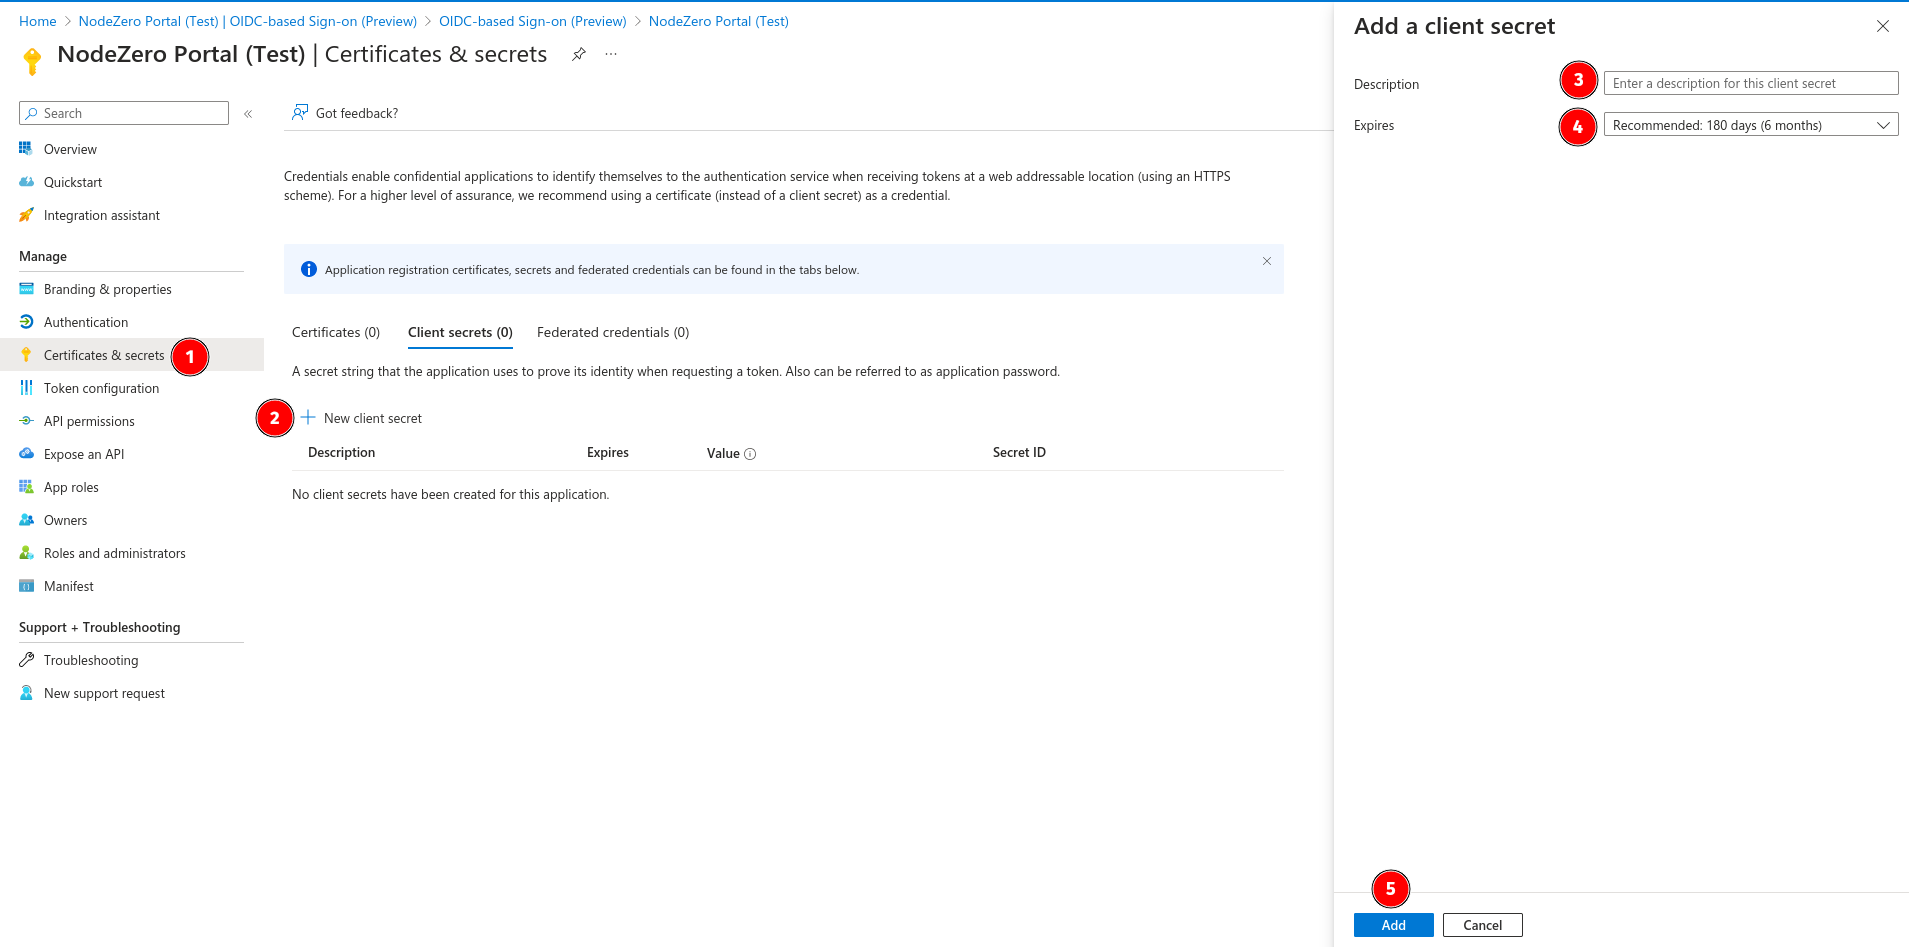
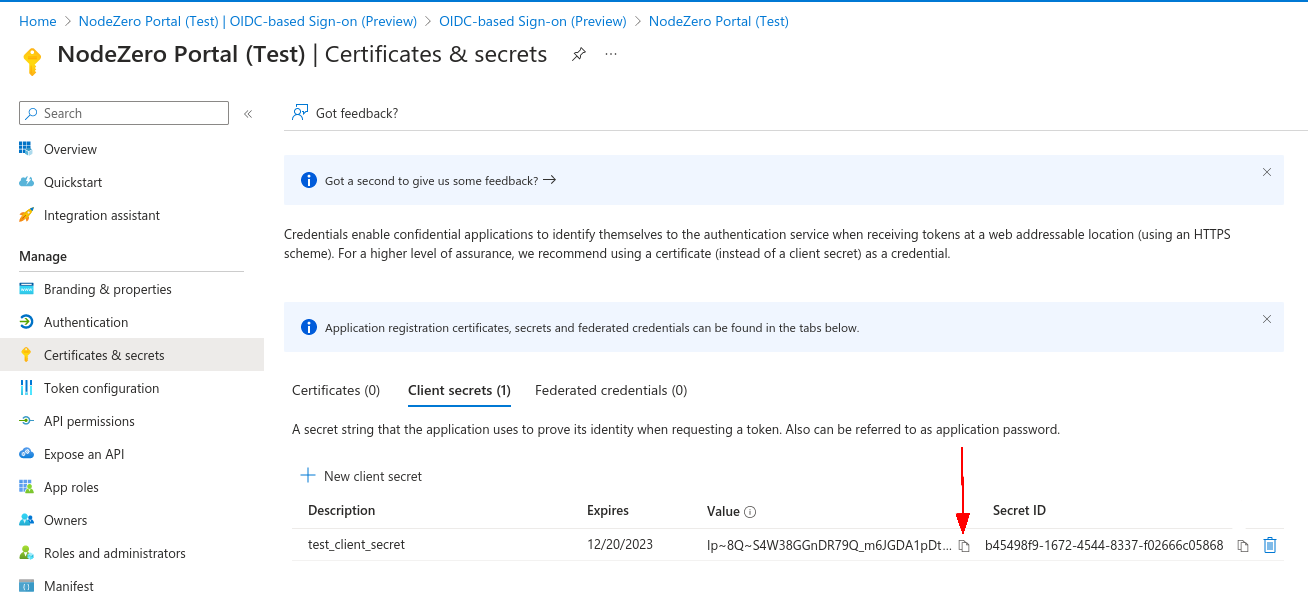
Create Client Secret
Under the Manage section, click Certificates & Secrets.
Click New client secret.
Enter a description. Set the Expires column to a value that aligns with your Company's policies.
Click Add.
Copy the Secret Value.
This is the Secret VALUE, that you will need to provide to your Portal Org Admin later.
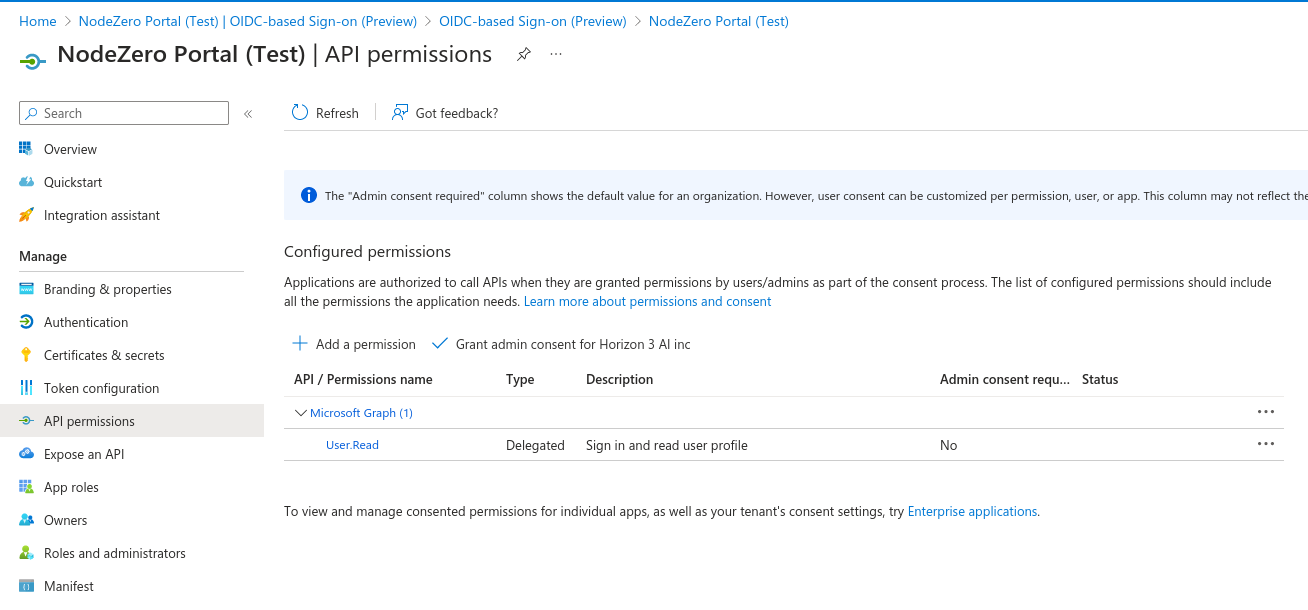
Configure API Permissions
Under the Manage section, click Api permissions.
Ensure the Microsoft Graph User.Read permission is configured (it should be by default).
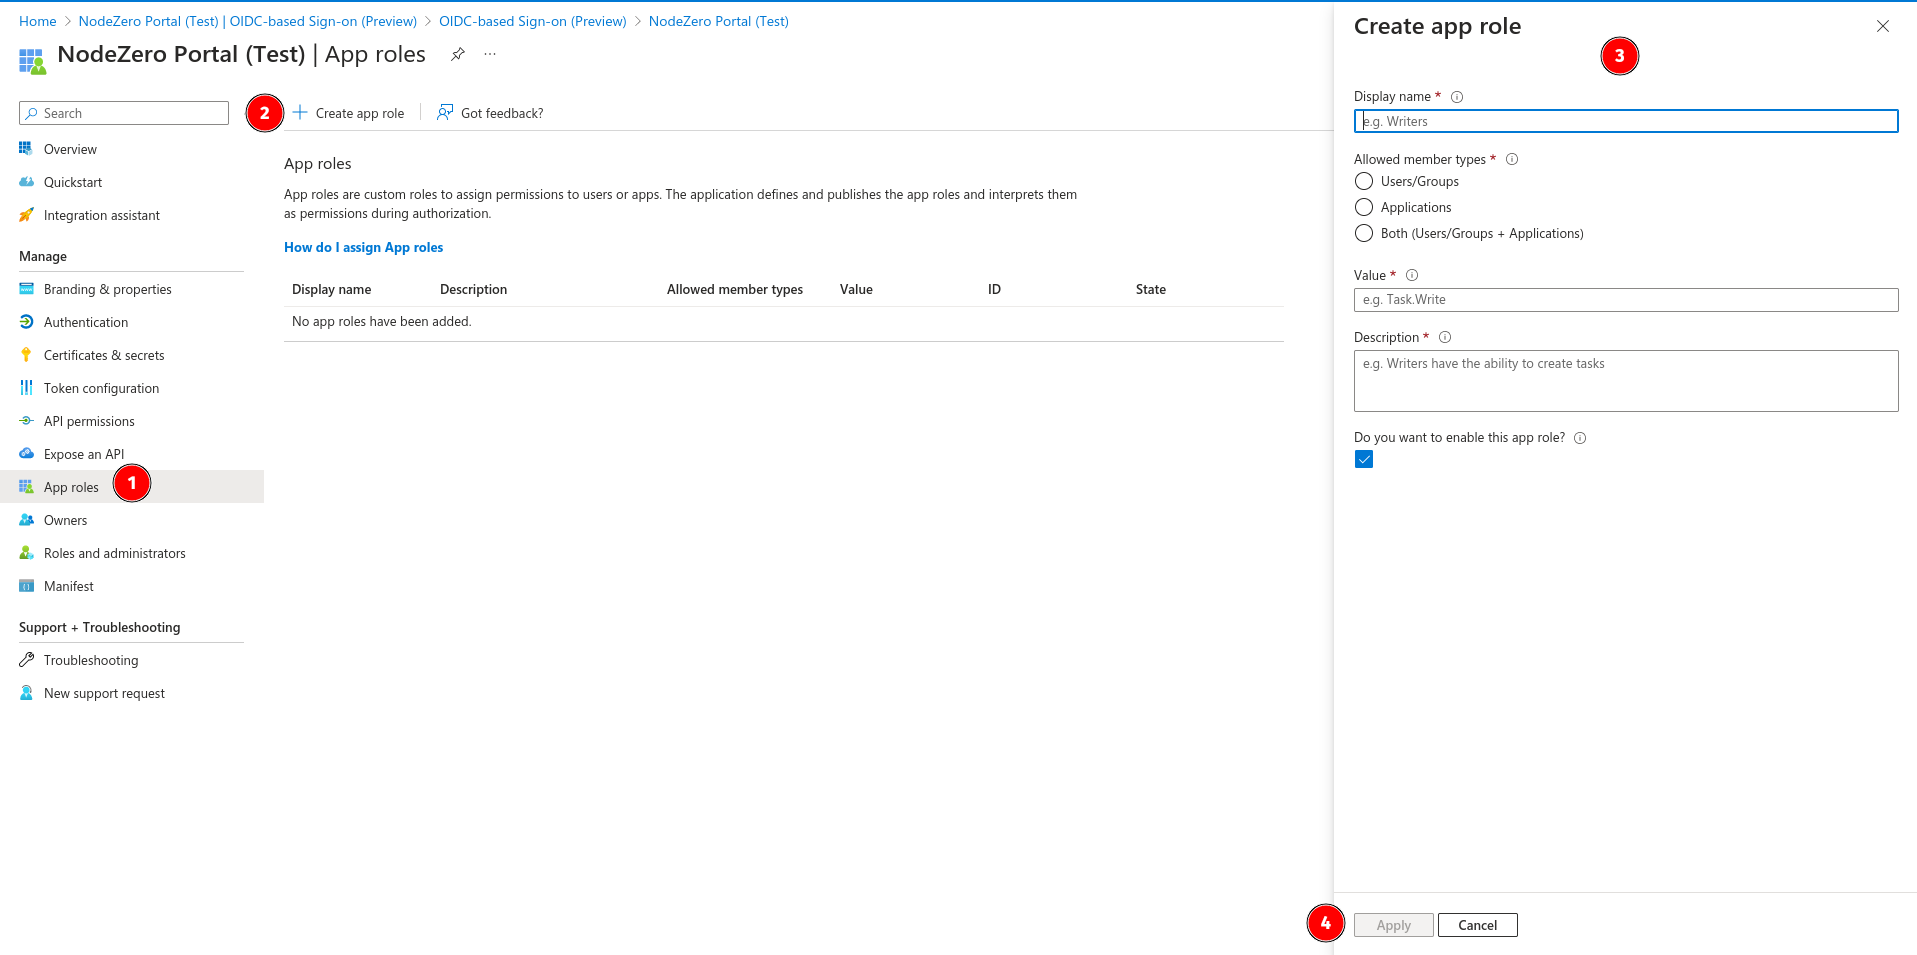
Configure App Roles
Under the Manage section, click App roles.
Click Create app role.
Fill out the form that opens on the right using the information in the table below.
| Field | Value |
|---|---|
| Display name | NodeZero Portal Users |
| Allowed Member Types | Users/Groups |
| Value | Read |
| Description | App role granting read to NodeZero Portal app. |
| Do you want to enable this app role? |
Click Apply.
Provide Information to Org Admin
Provide the Client ID, Client Secret, and Issuer URL you copied in previous steps to your Portal Org Admin so they can configure the SSO Provider in Portal. After the SSO Provider has been set up, your Portal Org Admin will need to provide you the Initiator URL so you can complete the app configuration.
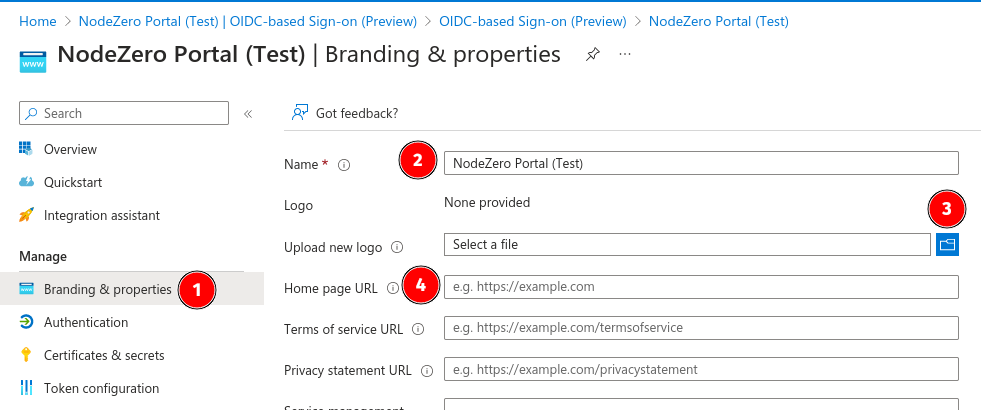
Configure Branding & Properties
Initiator URL
You will need the Initiator URL from your Portal Org Admin before you can proceed with this section.
Under the Manage section, click Branding & properties.
Fill out the form using the information in the table below.
| Field | Value |
|---|---|
| Name | NodeZero Portal |
| Logo | H3 Logo |
| Home page URL | Add Initiate login URI here |
Click Save.
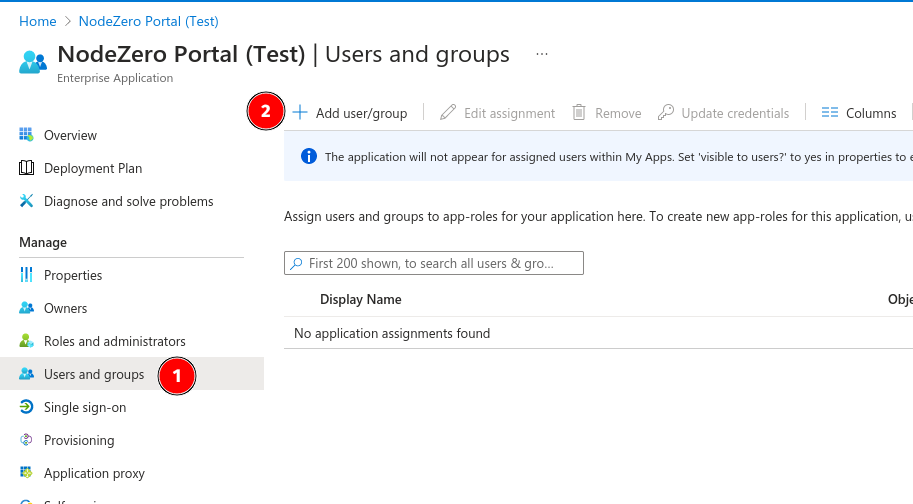
Configure Users and Groups
To grant users access to your new app, you will first need to navigate back to the Enterprise applications page we visited at the beginning of this guide.
Under the Manage section, click Users and groups.
Click Add user/group.
Select the appropriate users/groups.
Select the "NodeZero Portal Users" app role we created in a previous step.
Click Assign.
Edit App Properties
By default, the app will not appear for assigned users within MyApps. You will need to edit the visibility and assignment properties of the app.
Under the Manage section, click Properties.
Slide the toggle to "Yes" for both Assignment required? and Visible to users?.
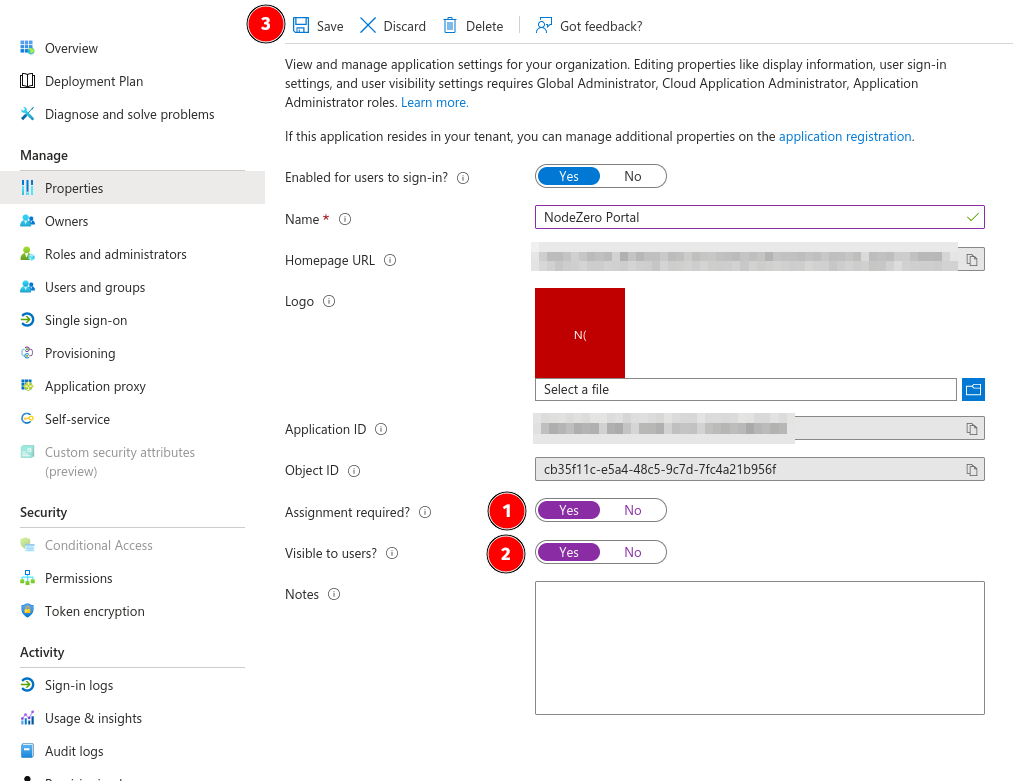
It can take 5 - 10 minutes for the app to appear in MyApps.
At this point, users can access by navigating to MyApps,
logging in with their company credentials, and selecting the NodeZero Portal application tile.