Run 1-click verify
1-click verify enables you to quickly and conveniently schedule a pentest to verify that specific weaknesses have been remediated. This supports and helps to facilitate the Find-Fix-Verify loop.
How does it work?
1. Select the weaknesses and add them to the cart
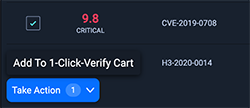
Under the Weaknesses tab, we've added a 1-click verify functionality to all weaknesses that are 1-click verifiable. Note that not all weaknesses are 1-click verifiable. 1-click verifiable weaknesses are those that can be reliably verified even when the pentest scope is limited to only a single host or set of hosts affected by the weakness. Weaknesses that require complex chains involving multiple hosts and credentials would not be considered 1-click verifiable.
If a weakness is 1-click verifiable, you will see a checkbox on the row, and when you check it, you will notice that the Take Action button on the bottom of the page is now clickable. When you click on the button, you will see a sub menu item called Add To 1-Click-Verify Cart.
2. Verify the cart contents
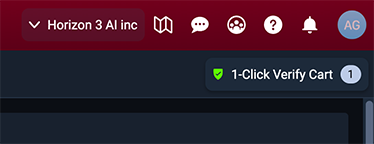
When you click on the sub menu to add the weakness to the cart, you will see the 1-Click Verify Cart showing up on the top right corner of the page.
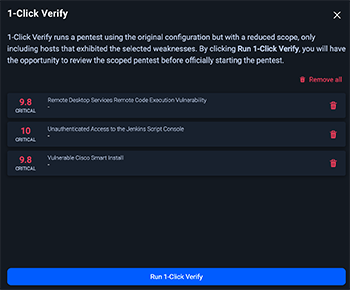
You can verify the content of the cart and remove any unnecessary weaknesses, or cleanup all and start over.
Once you are ready, click the Run 1-Click Verify button at the bottom of the page, and you'll be presented with the pentest-scheduling popup.
3. Run 1-click verify pentest
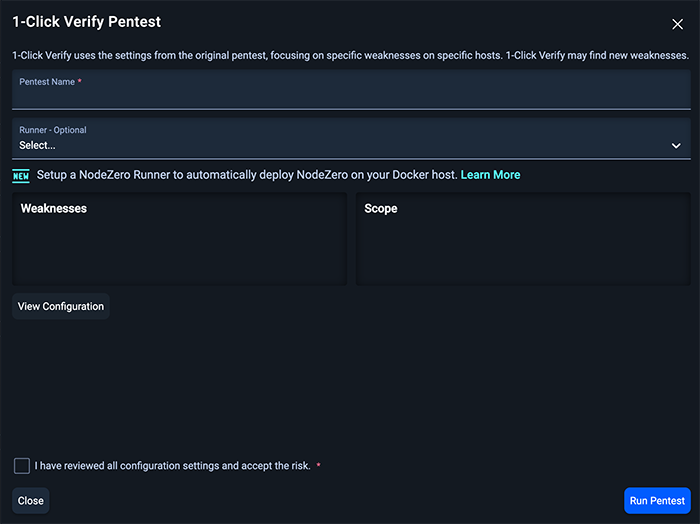
The pentest scheduling popup is pre-populated with a scope that includes only the hosts affected by the weakness. All other configuration settings are copied from the original pentest containing the weakness being verified.
In this popup window, you have the option of scheduling the pentest as-is, or you can update the pentest name, or optionally choose a runner. You can also see the existing configuration by clicking the View Configuration button. From here, make sure that you check the checkbox that reads I have reviewed all configuration settings and accept the risk. and click on the Run Pentest button.
4. Checking the results
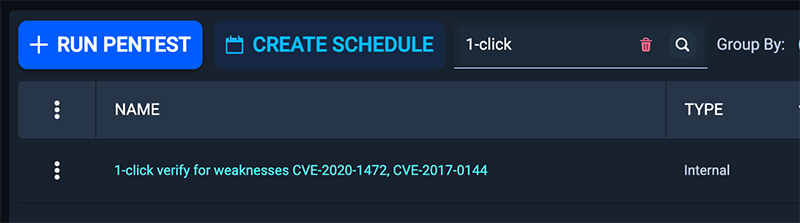
The newly scheduled 1-click verify pentest appears in the pentest list with its own record. Its name defaults to 1-click verify for weakness CVE-XXXX-XXXX, unless you changed it during the previous step.
When the pentest completes, the weakness being verified will (ideally) not appear in the output. This most likely means the user has successfully remediated. However, the only thing we can claim with certainty is that we did not find the weakness.
Why do you need it?
An ideal use case is that you first run a pentest against your entire network and find perhaps many weaknesses across dozens or even hundreds of hosts. Depending on the size of their network, the pentest might take a while to run (e.g., a pentest against 5000+ hosts might take a week). You might remediate one or two weaknesses and wish to run a second pentest to verify. With 1-click verify, you can narrow the scope of the second pentest to the hosts affected by the weakness you wish to verify. Given the narrowed scope, the second pentest is likely to complete much more quickly, perhaps within an hour (all depends on the size of the scope). This enables a quick verification of your remediation efforts and fuels the Find-Fix-Verify loop.
What problem does it solve?
Rapid, targeted verification of your remediation efforts enables you to make incremental and verifiable progress toward the goal of eliminating weaknesses and improving the security posture of your network.
1-click verify can be a fast-path to helping you verify and document the corrections you have made during a compliance audit, such as the Payment Card Industry Data Security Standard. Once you have verified that your remediation is complete, simply download the 1-click verify report as evidence to submit to your assessor.